TFL Painting Challenge: Second April Update

A second April update to keep on top ofall the entries coming in.

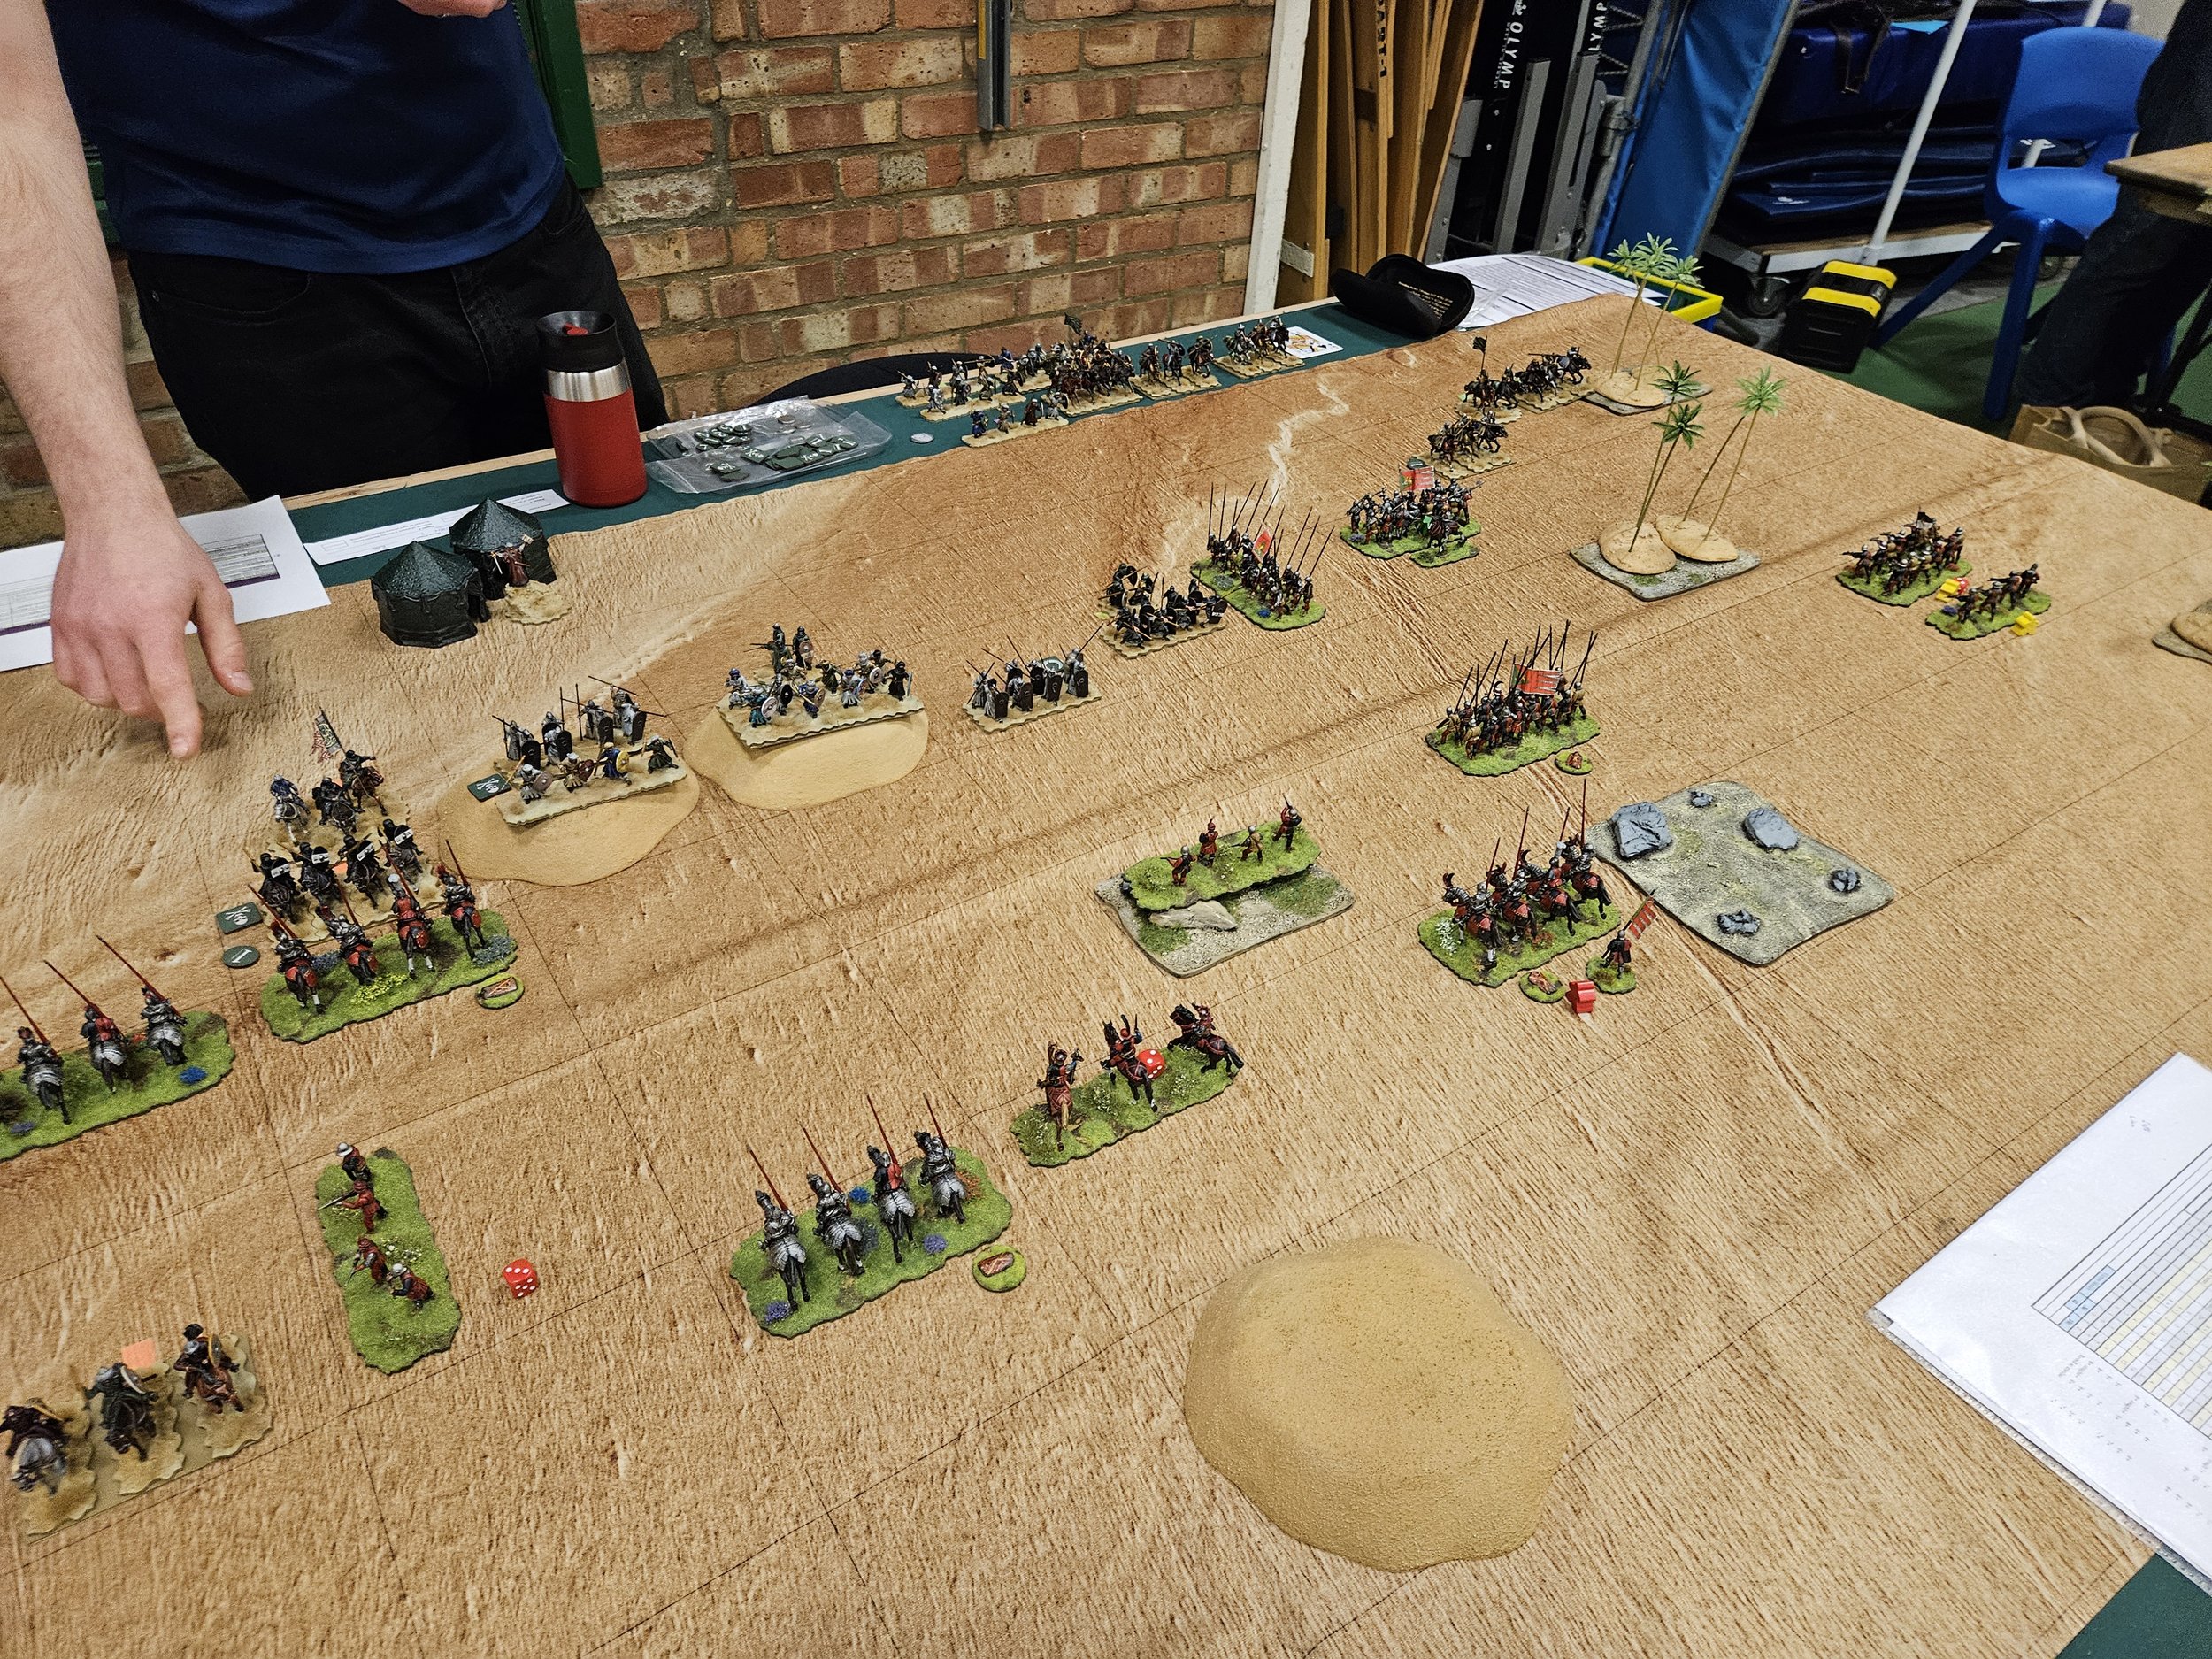
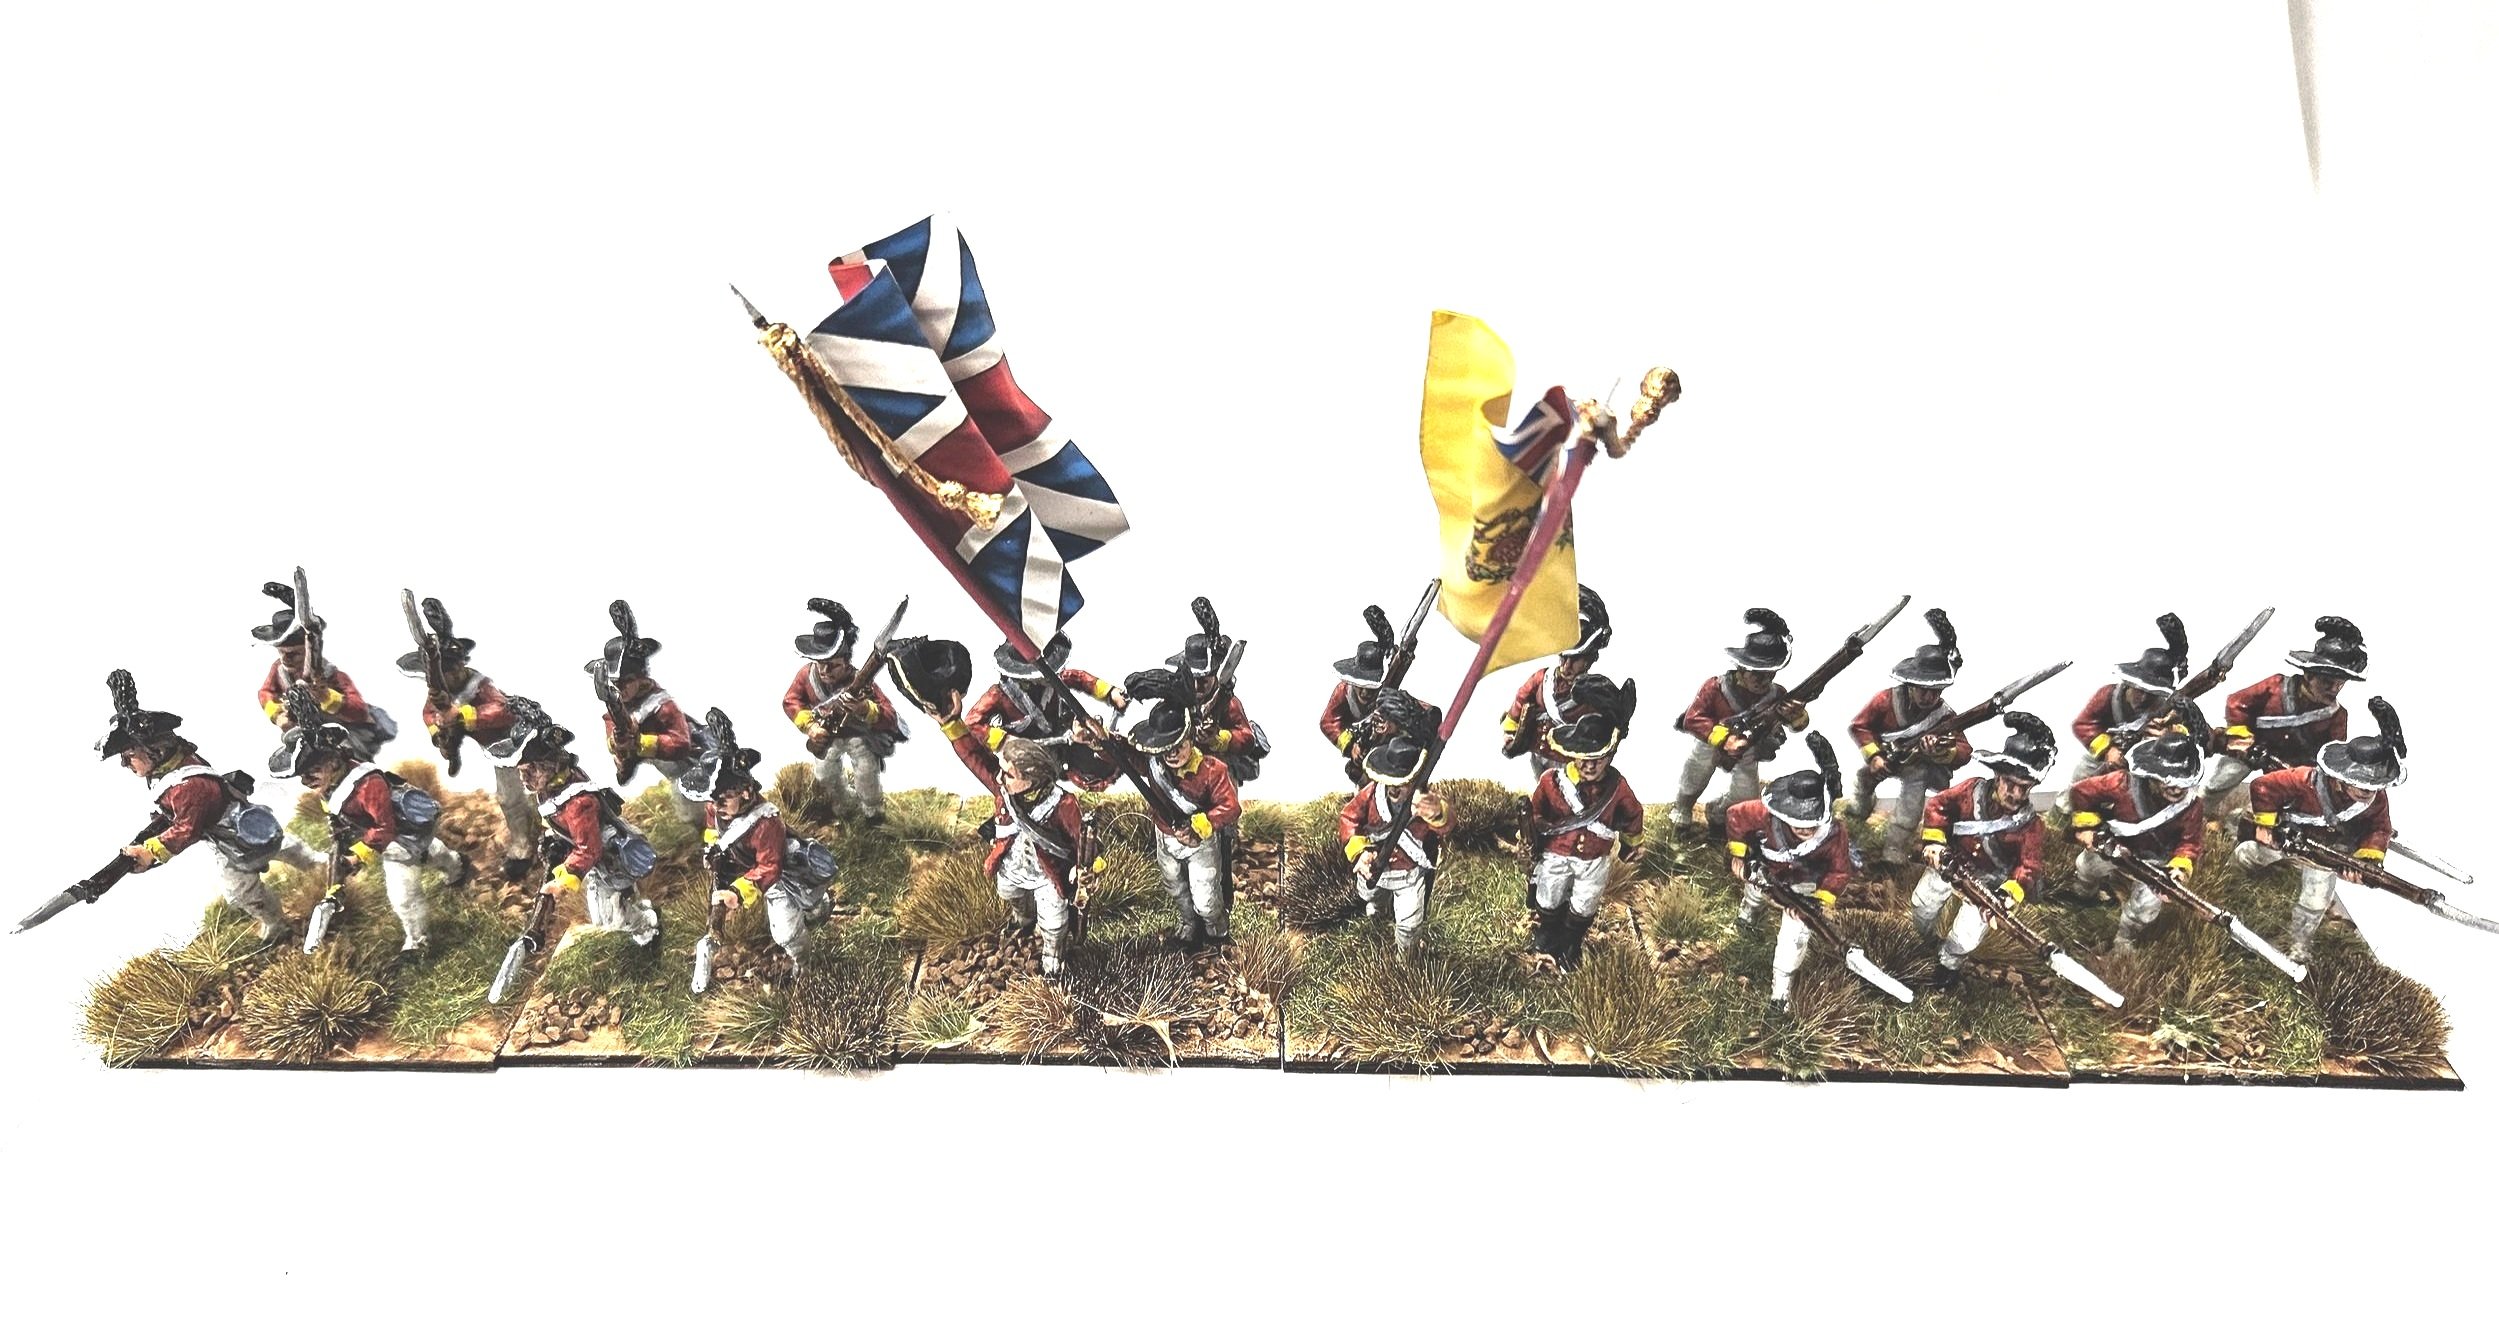
First up, Mr Helliwell, who switches his attention back to 15mm Napoelonics with a large multi-unit entry of which the following are just some examples:

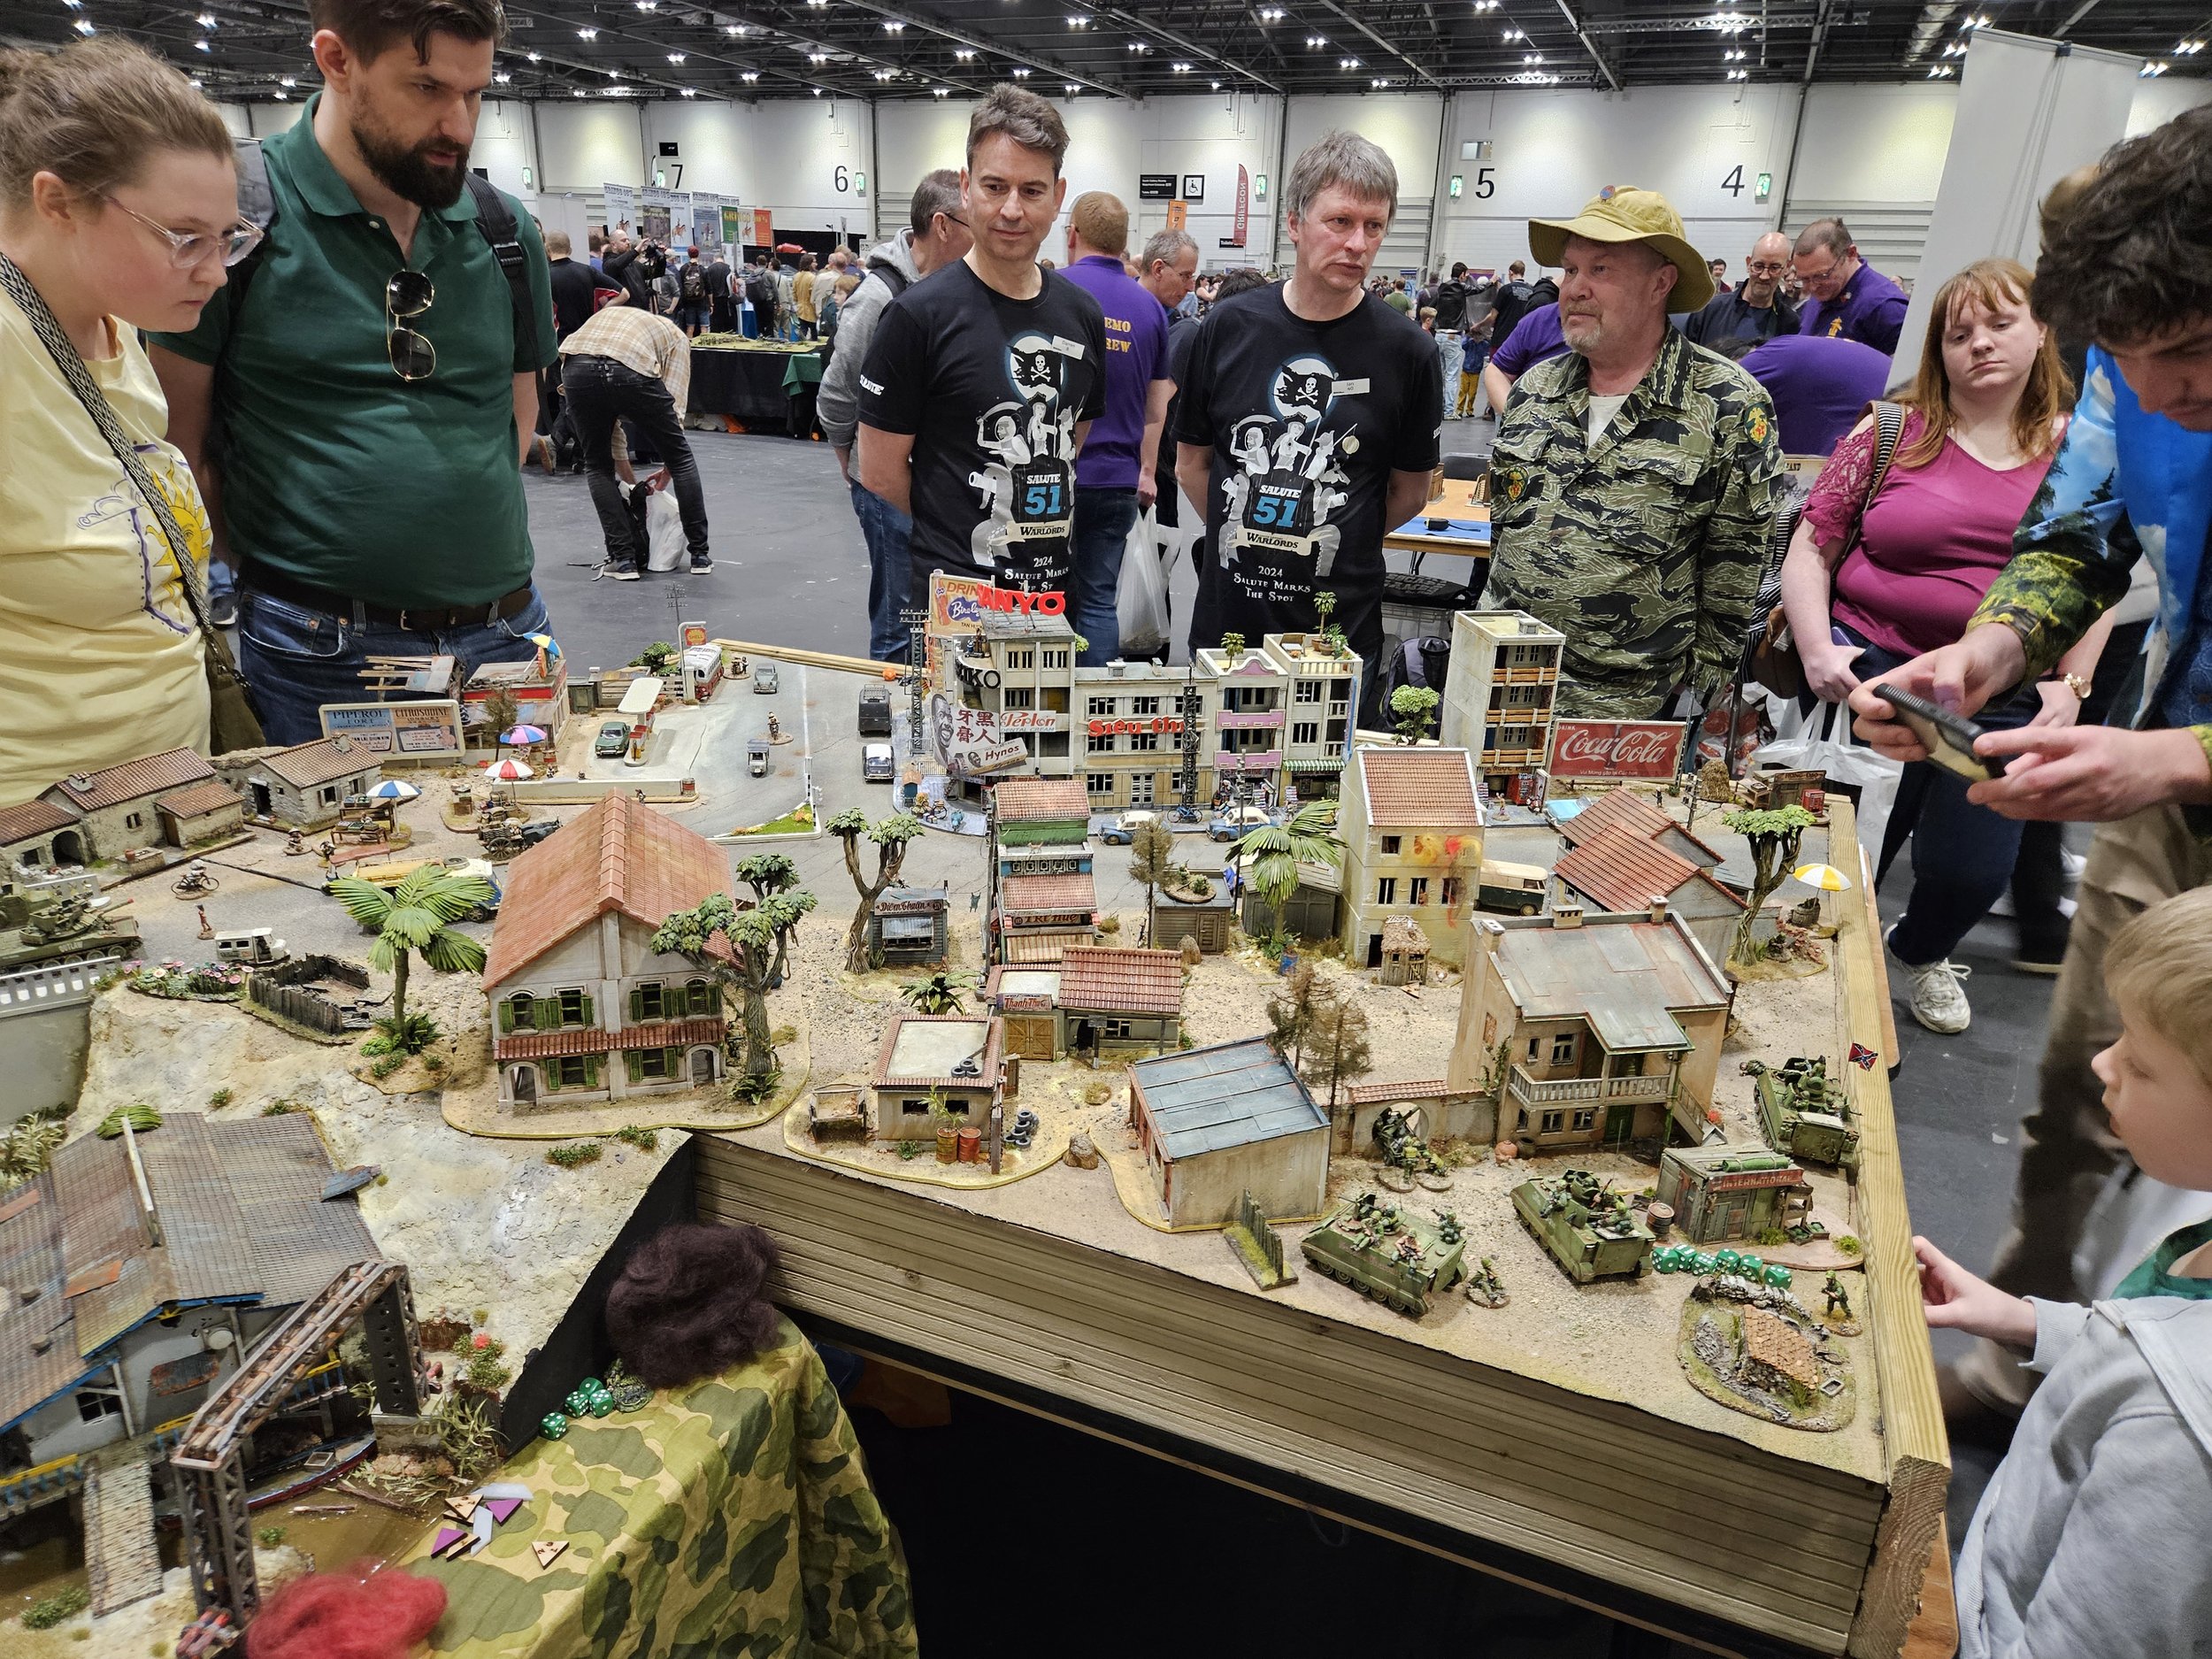
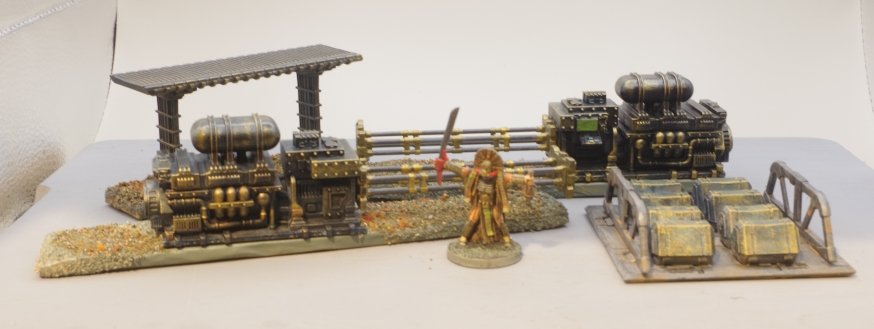
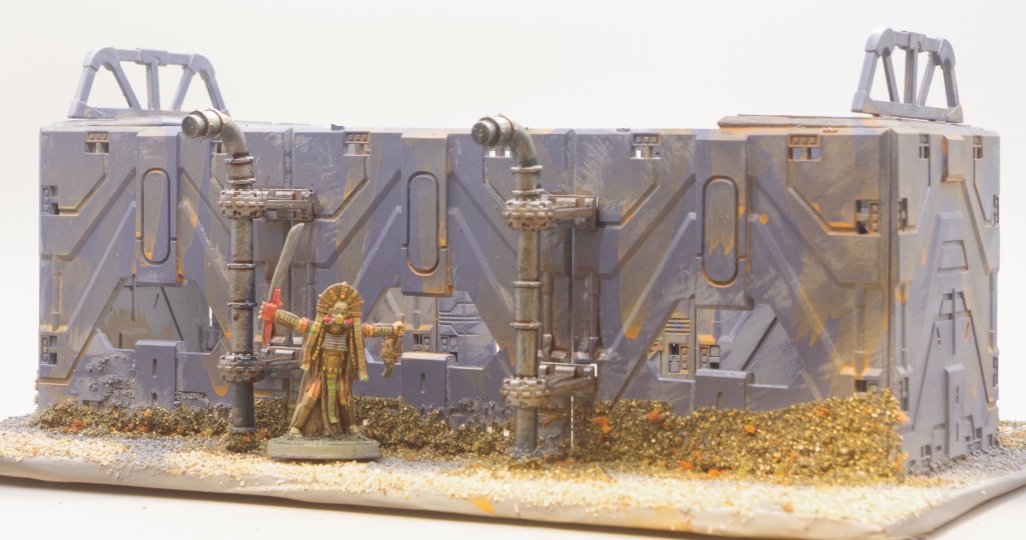
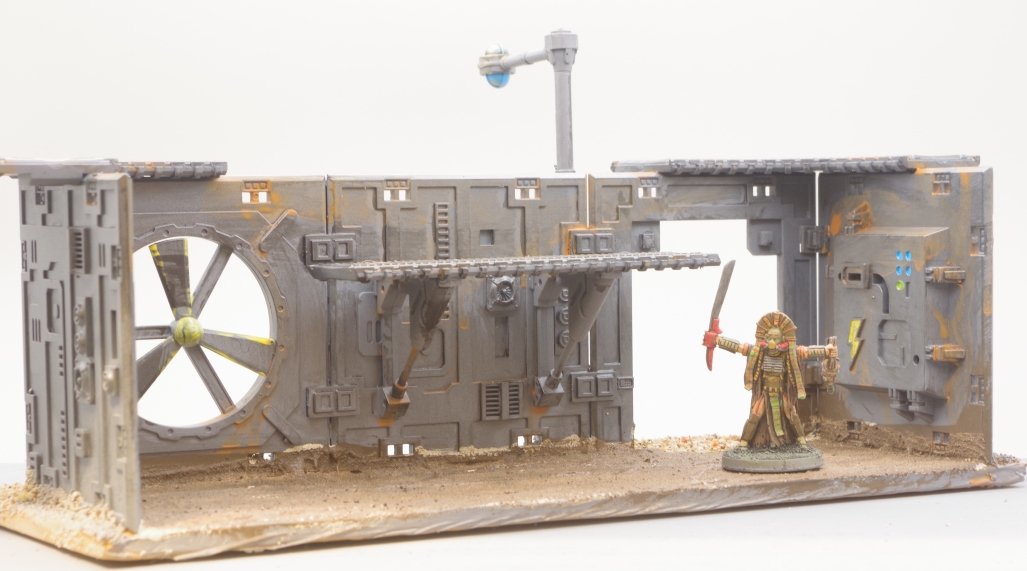
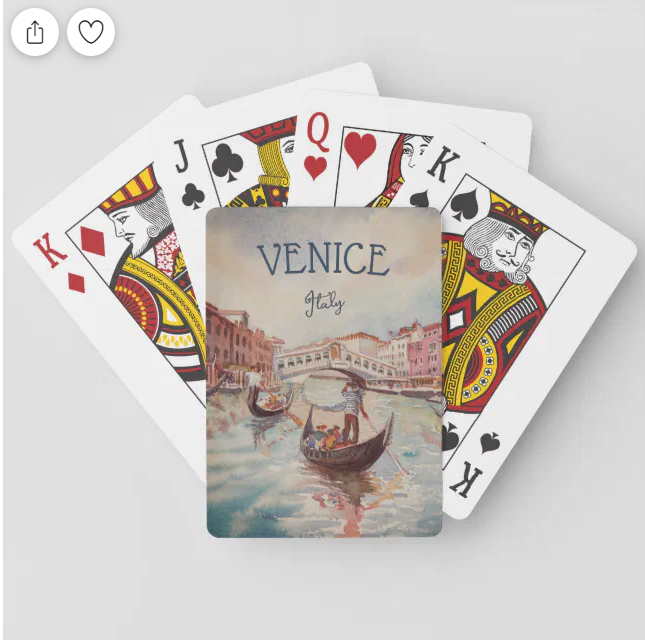
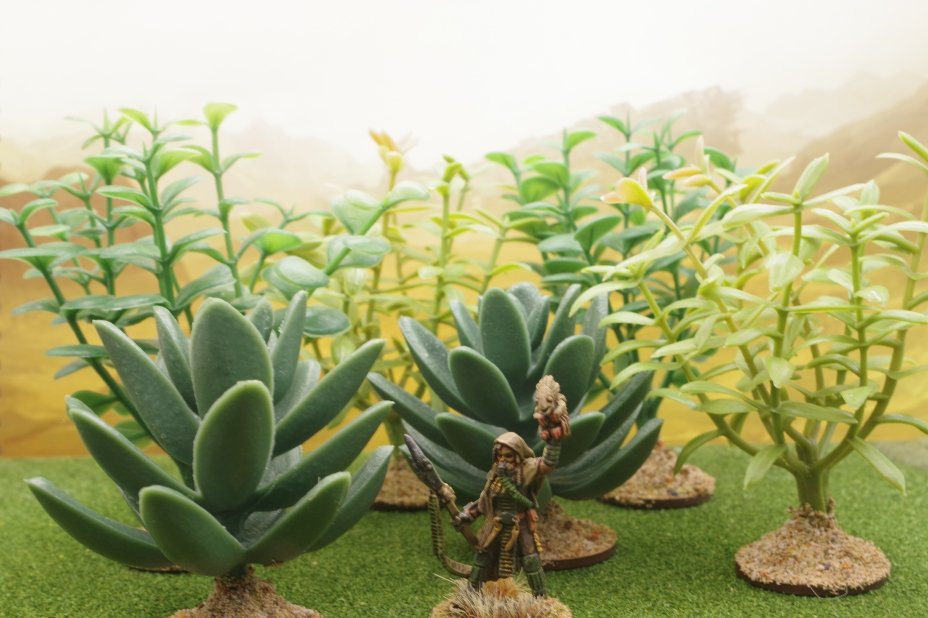
Carole is still producing vast amounts of terrain: a combination of ruins, buildings, fencings and plantings!

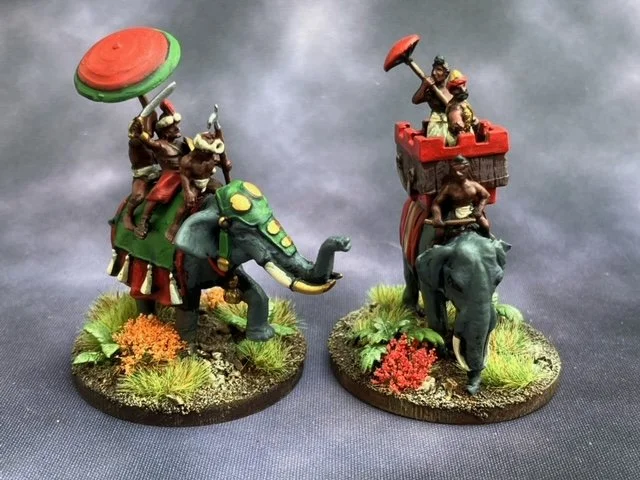
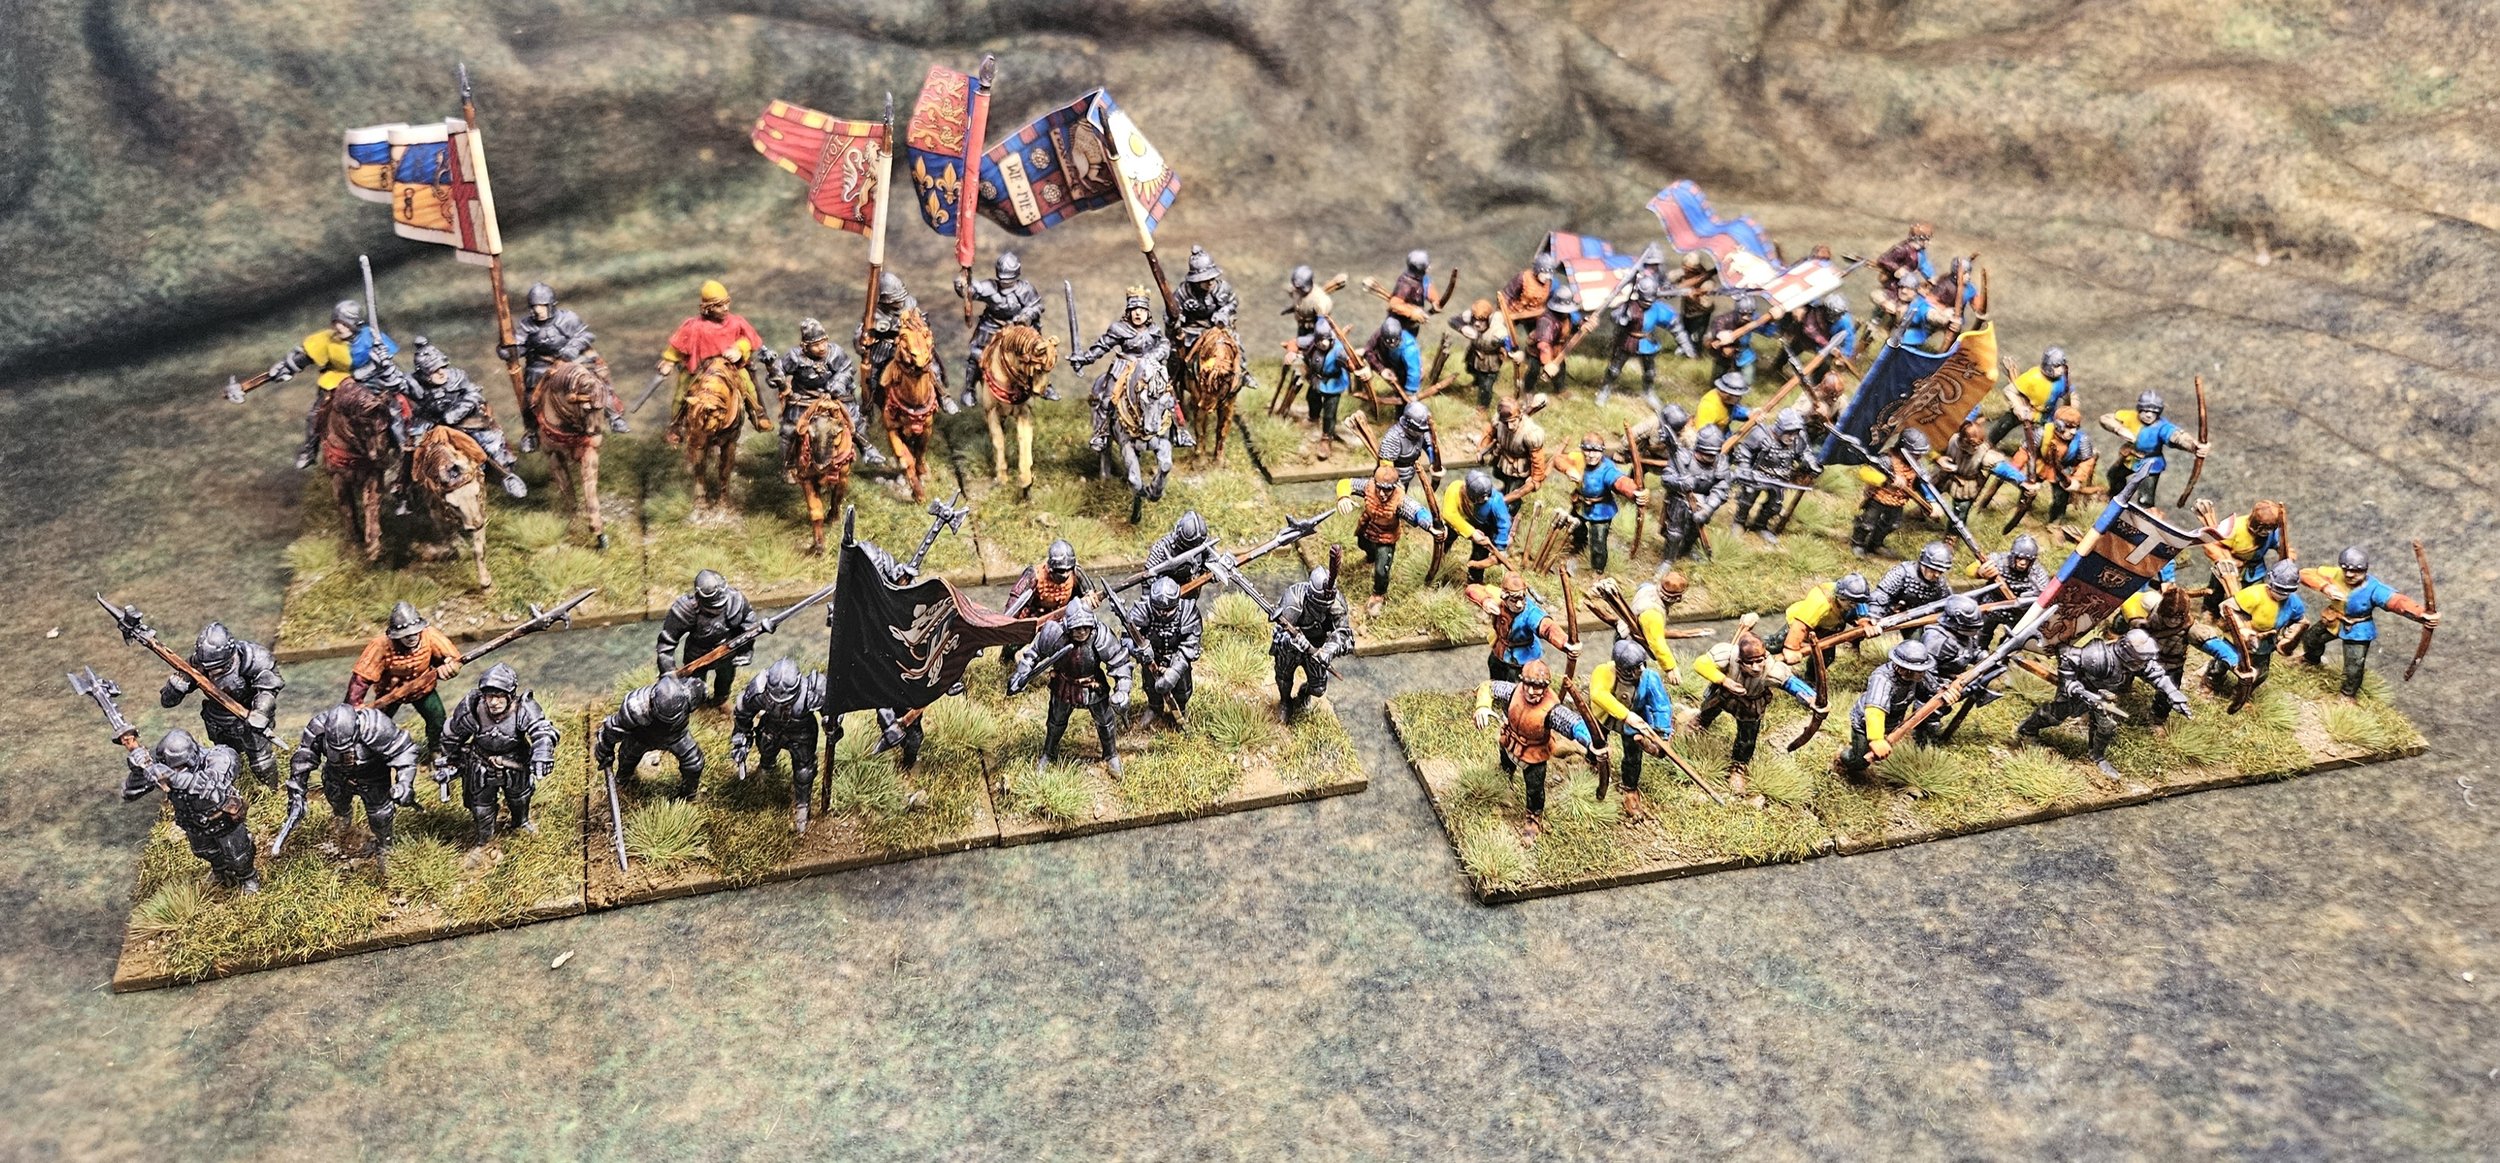
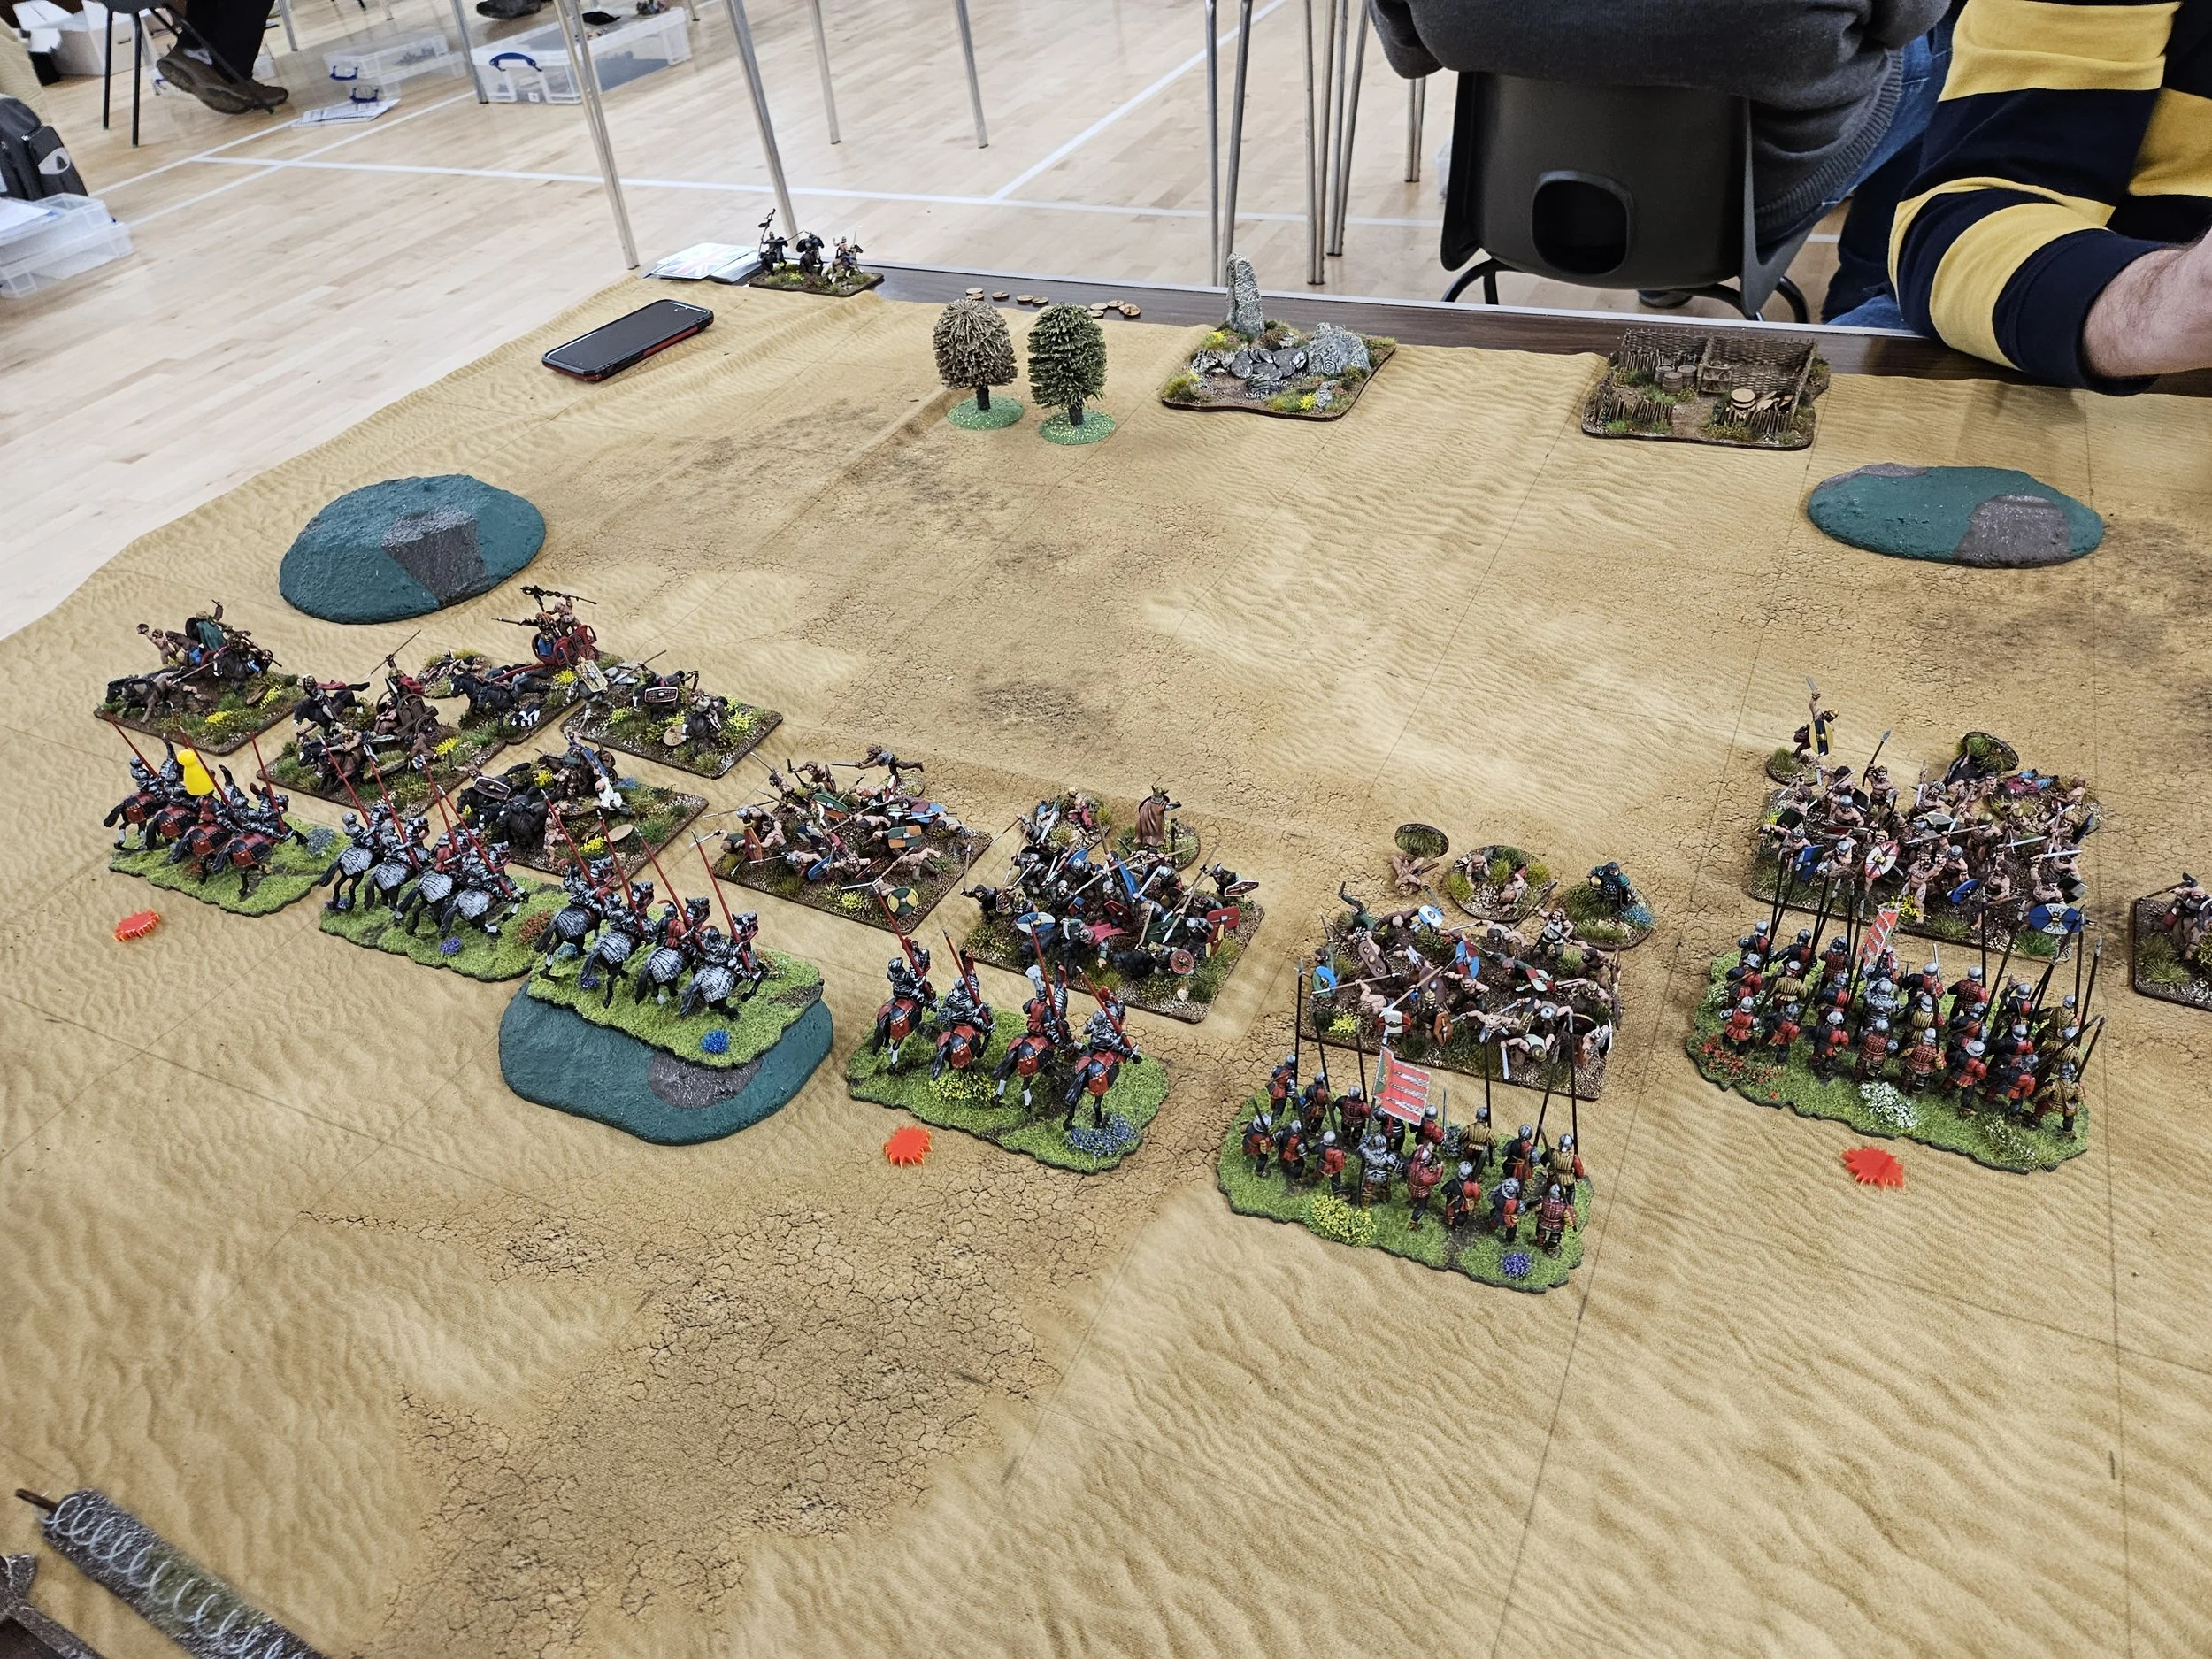
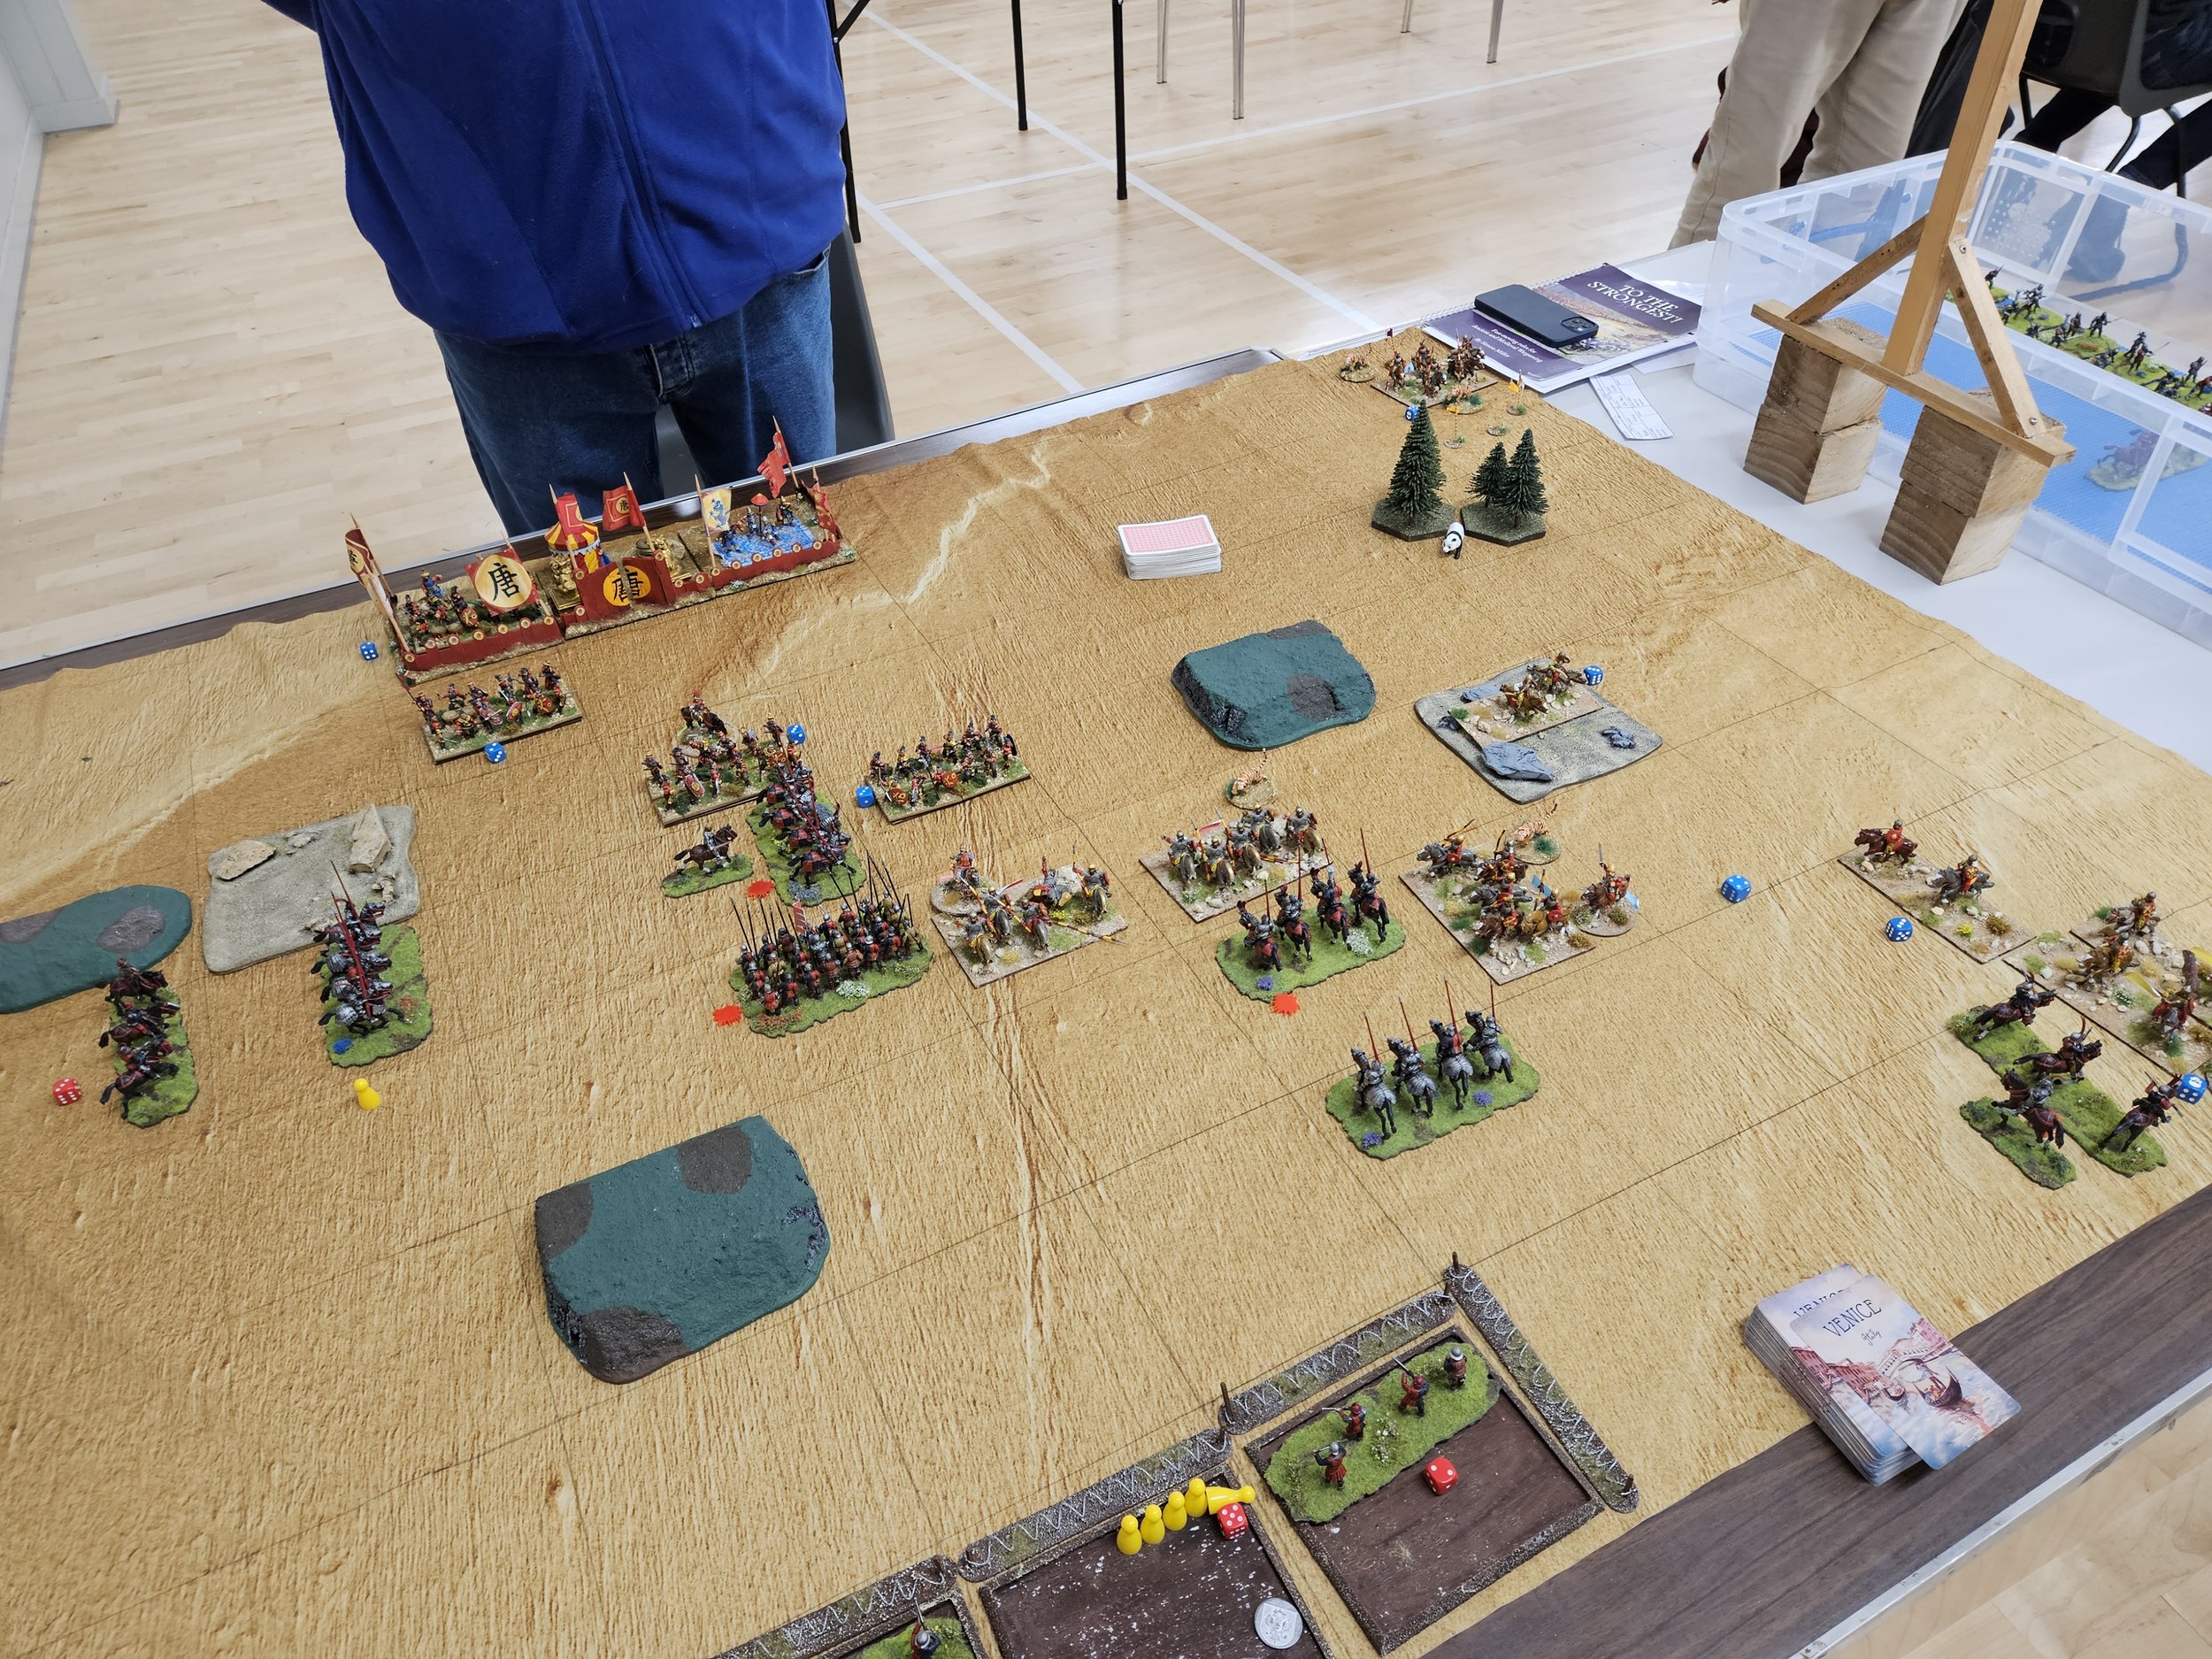
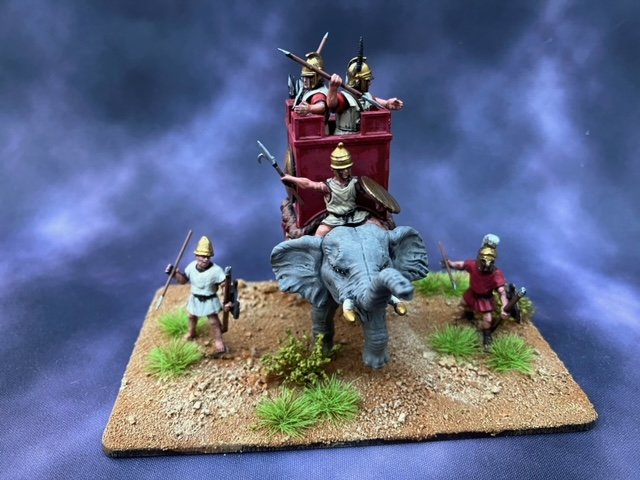
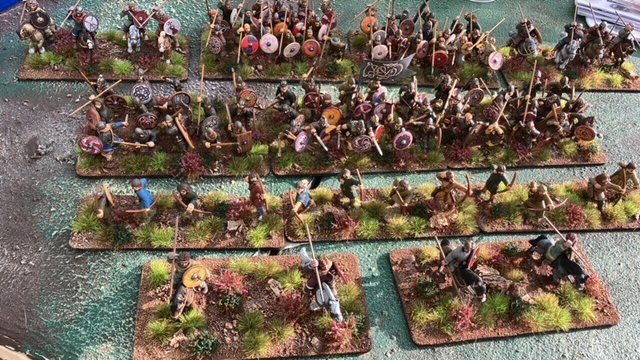
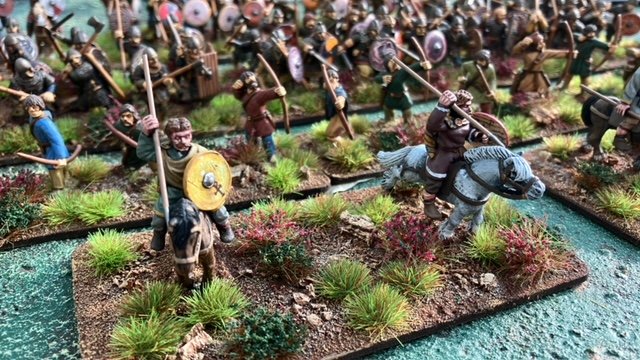
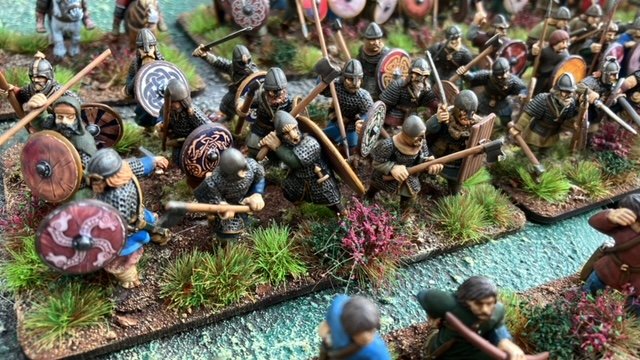
In amongst some more elephants, Mr Slade has re-based a significant dark age force. For those who don’t knwo, you can claim re-basing in the Challenge: you just score half points.

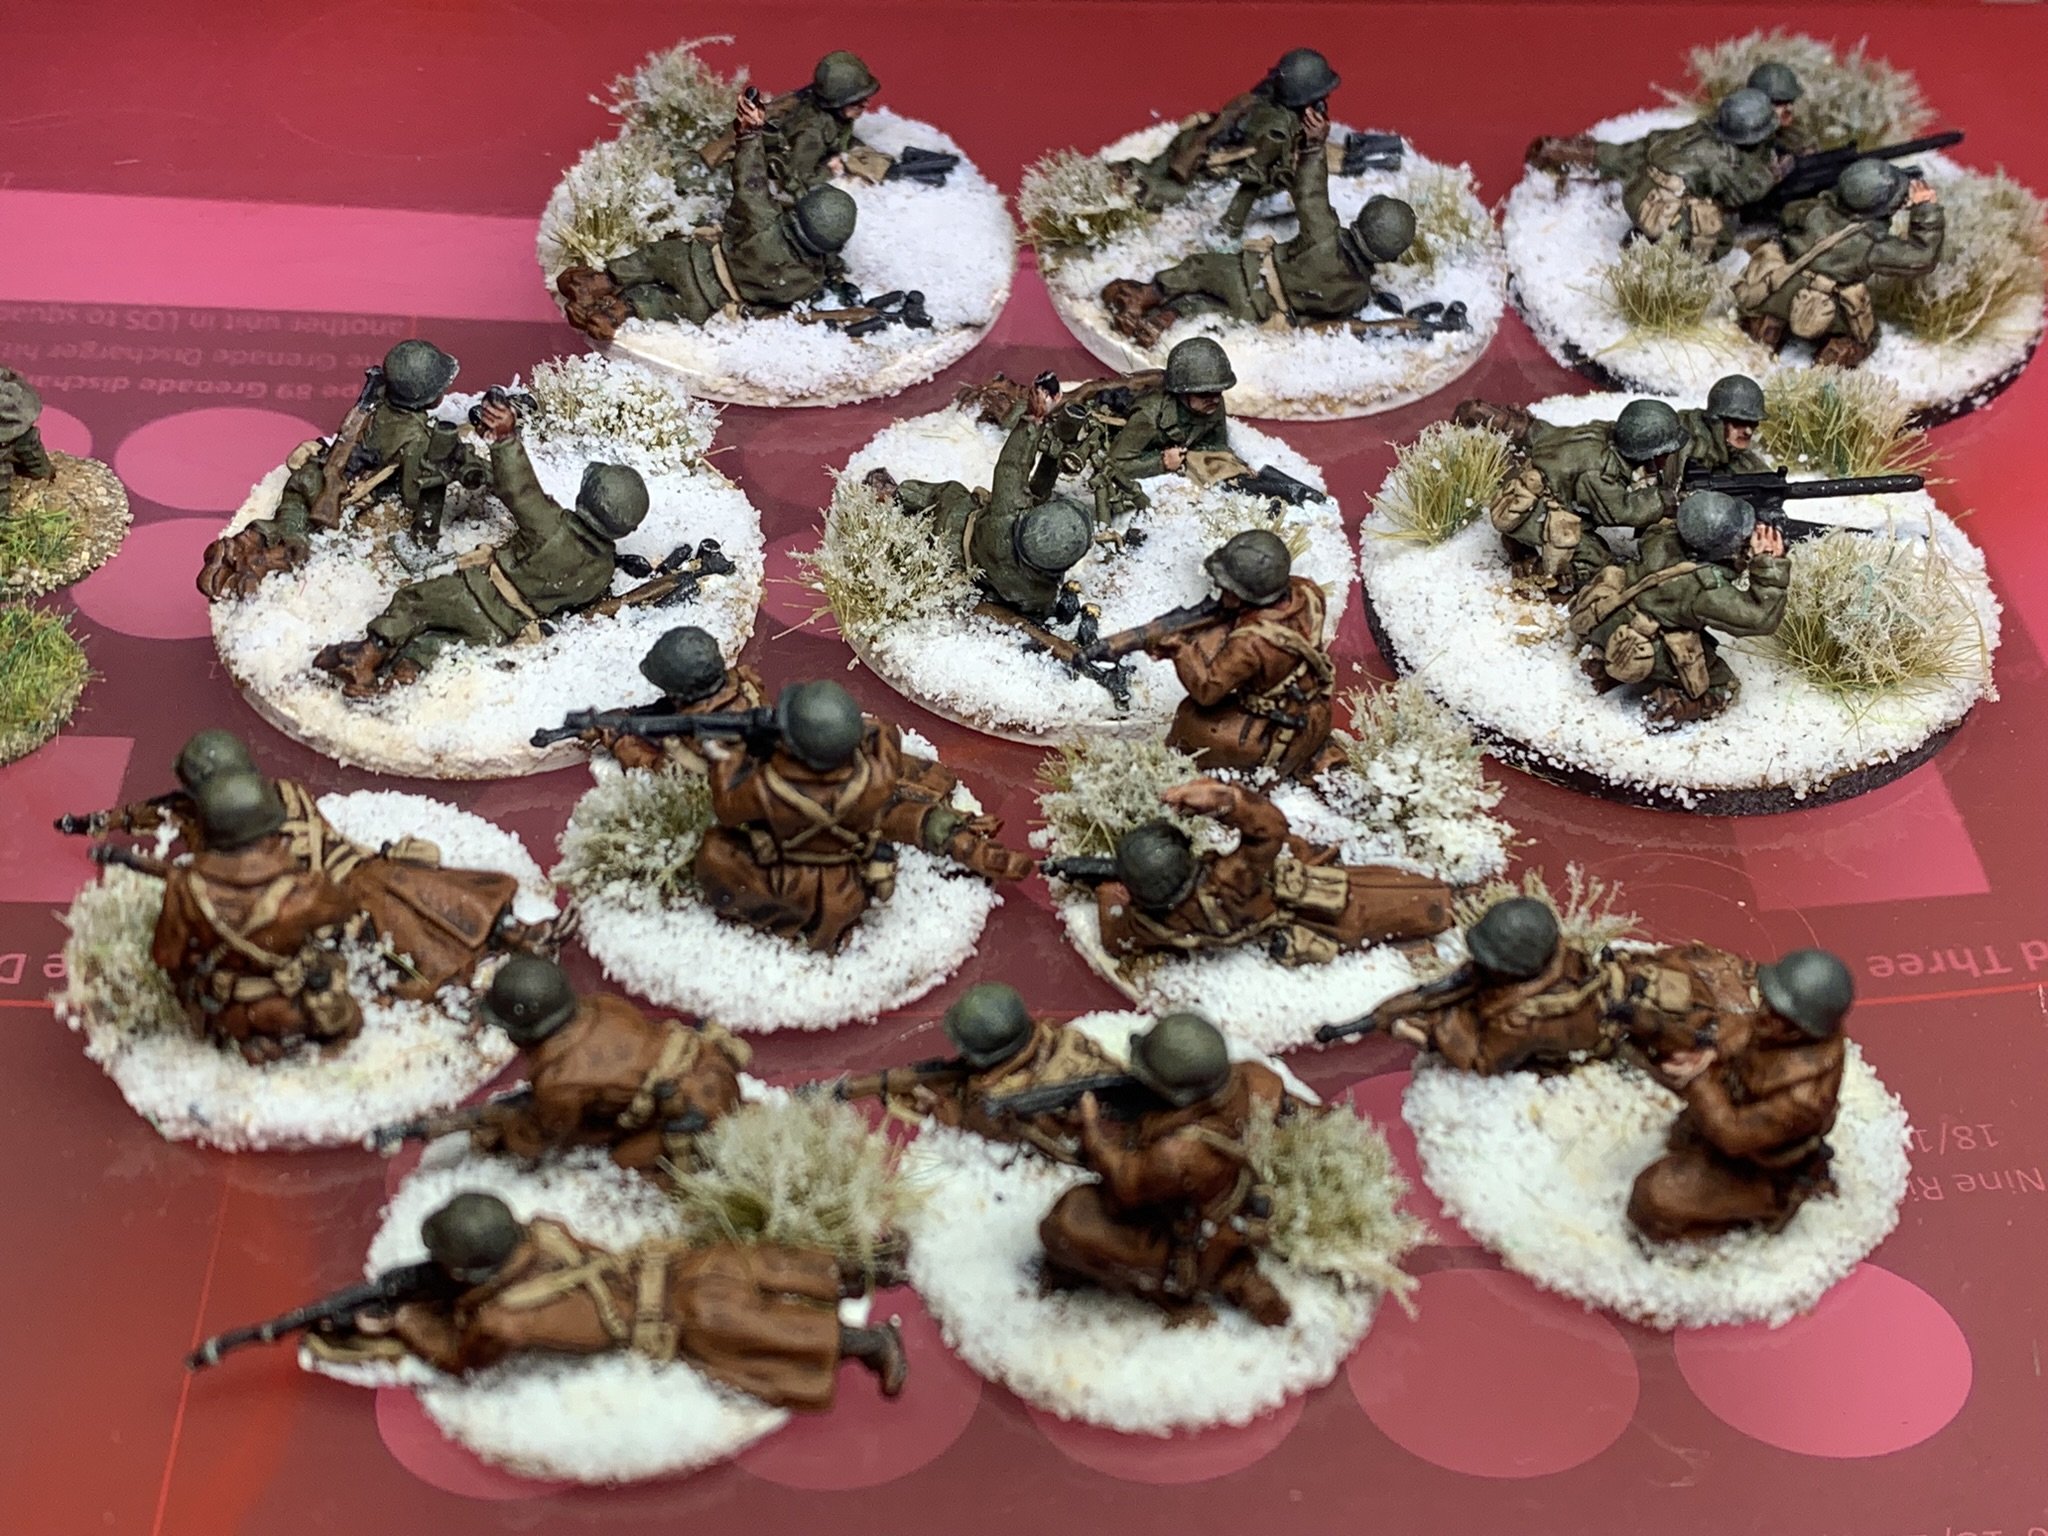
Excitingly this week, we have a new entrant to the Challenge: Des Darkin starts his quest for points with some 20mm WW2 troops. welcome Des: I’m sure that many more will follow.

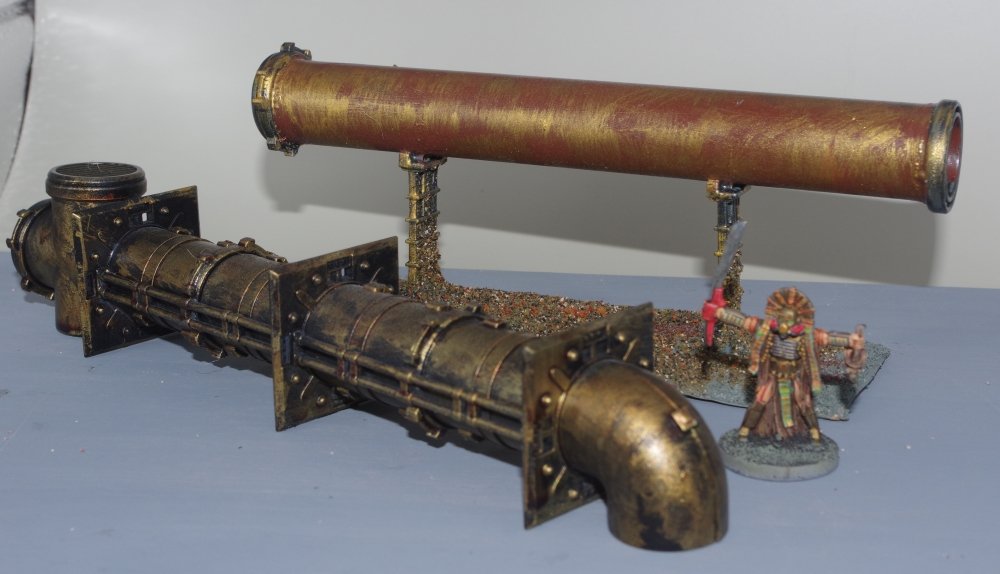
Finally, a quick round up of the other entries received this week. Here we have John Emmett’s V1 rocket launcher; Mervyn’s Romans and the start of a massive fleet from Mr Burt.

Keep them coming!

TTA AAR: Venetians Abroad versus Ayyubid Egyptian

My third game at Roll Call 2024 was against Andy’s Ayyubid Egyptians: another beautifully painted army.

Neither side was particularly interested in doing anything excapt having straight at the enemy, although I did make a point of maintaining my line as much as possible.

The game quickly split into two sectors: the centre/right and left.

On the centre/right, my Knights and Lights worked together to drive back his quality cavalry and infantry. As usual, half my Knights rode straight over their opposition without difficulty and half failed to achieve anything at all…but, generally, the action in this sector went in my favour.

On the left, however, my infantry didn’t do as well as I had hoped, and soon the Ayyubid’s were threatening my camp.

The game looked in the balance at this point but, fortunately, my troops on the right were now in a position to hammer their wavering opponents. They duly did so, and the collapse of the Ayyubid left gave me a 12-6 victory before Andy did to me on my left what I had just done to him on his left.

So a loss, two wins, and one more game to go!

Last of the Venetians?

As I’m now using the Venetians Abroad list rather than the Later Italian Condotteri (Venice) list for my latest To The Strongest army, I found myself in need of some extra Spearman units.

Regular visitors will know that I have gradually added these in over the last couple of months, with only the one to go: the raw, militia Lancieri dredged from the depths of the dankest, darkest canal!

I wanted something different for these boys: I like to be able to identify my units without markers (yes, I know I usually have Meeples everywhere! - but that’s to help you, not me) so decided to really make the militia stand out.

Here’s a regular Lancieri unit:

Very serious looking chaps.

And here are the militia:

No flag, no armour, only the back rank are properly equipped - the rest have had to grab whatever’s left in the armoury - and, best of all, the man in charge is not the usual officer but a chef:

This is a cracking figure that I sourced from Kingdom Games: Drunk Cook DnD Dungeons and Dragons Miniature - Epic Miniatures 28mm. I am loving the chicken!

So now my Venetians are complete, although I realise that this phrase is utterly meaningless to a true wargamer!

TTS AAR: Venice Abroad vs Almoravid Berber (Roll Call Game Two)

My second game at Medieval Mayhem at Roll Call this year was against Matt’s Almoravid Berbers.

This was a beautifully painted army consisting of a unit of Black Guard veteran cavalry, a unit of Mercenary Knights, some Shieldwall (including more veteran Black Guard types) and then lots of light horse with javelins.

As the Berbers won the scouting, you’ll see from the montage, below, that my Knights faced off against his cavalry and infantry, with my foot deployed slightly to the right and mainly facing the light horse. Methinks I might get outflanked on the right!

Both sides opened the game with an advance and, with a bit of help from the cards, I was lucky enough to be able to extend my line out to the right before the Berber light horse had a chance to lap around it. Okay, so I only had raw crossbowmen and light crossbowmen out there on the flank, but that was better than nothing at all.

My plan, for those interested in that sort of thing, was to hold his infantry and light horse in the centre and right respectively whilst my Knights and Later Knights punched through his cavalry on the left, took his camp, and then the rest of his line in the rear.

The action began on the right, when Matt’s light cavalry came forward to harrass my advancing infantry. Crossbow bolts headed their way and, much to Matt’s dismay, one of his units was shot off the table. The other made no impression on my infantry, who continued to advance remorselessly.

By this time battle had also been joined on the left, with the Christian mercenary caballeros being blasted from the table by my Knights in one glorious impact whilst my Later Knights attacked the mounted Black Guard.

Unlike the Knights, the Later Knights bounced off the Black Guard and ended up very vulnerable to a counter-attack.

Up to now the plan had worked perfectly, but the cards just wouldn’t let me get the rest of my Knights stuck in on the left. Instead an uneasy stalemate occurred with neither side able to make any headway against the other.

This meant that I had to bring up my infantry before my left was overwhelmed by troops moved to reinforce Matt’s right and, fortunately, my Alabardieri and Lancieri were on tip top form and proceeded to convincingly win the centre.

My Knights on the left still weren’t managing to make any headway…

…so it was up to the Alabardieri to force the last of the Berber light cavalry off the table and win the game.

So having lost the first game 5-12, a 12-5 victory in the second game put me back to even-stevens and all ready for game three.

Salute 51 (2024)

I almost didn’t go to Salute this year - last year’s dismal 50th anniversary show really put me off - but, in the end I decided to make the trek to Excel one more time…and was really glad that I did so.

Salute this year was a really buzzing event. When I arrived at around noon, the show was packed with people, and it stayed that way for much longer than last year. Then, by 2pm, the place was almost deserted: this year it didn’t start emptying out until at least three.

Yes the hall was still dark, and the floor unforgiving, but, as I said, the show had a real buzz to it: something that has been missing recently. As there weren’t as many other shows on at Excel (a shame not to have the usual dichotomy of the Marathon check in!) the catering was easy to access as well: no need to queue at all.

On top of that, there was so much more to see this year, with crowds of people actually playing games, practising their painting or basing, or even mdf building. I would say that the demonstration/participation games at this year’s show were some of the best I have seen, well worth the ticket price alone.

The Lard Zone was in full swing: the huge Stalingrad game in the pictures below was Chain of Command, and there was Strength and Honour on show as well. Funny to think that the Lardies, always traditionally thought of as disruptors, are now fully mainstream!

Also good to see the huge For King & Parliament game based on my Siege of Norchester scenario pack. The last two pictures in the gallery below show a little of it but can’t really properly demonstrate its scale. Well done to Simon for putting it on, and the game won a prize as well.

Another reason to go to Salute is, of course, the shopping, and there was the usual cornucopia of things on offer. Not too many bargains but lots of new ranges on show, particularly in the fantasy space. I only actually bought something from Essex (whose stand ressembled Mr Ben’s shop in its simplicity and throwback to a bygone age in amongst all the flashier outlets) but could have seriously spend the childrens’ inheritance had I been on a buying spree.

So welcome back, Salute, as one of the premium events of the year! Here are a few photos of some of the games:

TTS AAR: Venice Abroad vs Later Swiss (Roll Call Game One)

My first game at this year’s Medieval Madness competition at Roll Call was against a very testing opponent: Dillon’s Later Swiss with their veteran, extra-deep and, in some cases, fanatical pike blocks!

I wasn’t sure what I was going to do against these beasts: stay away from the front and attack the flanks seemed to be the best course of action, but unfortunately the table we were on didn’t have a huge amount of terrain in place to slow the Swiss down.

Worse, the Swiss were also mounted infantry, so the game began with his pike blocks already one extra square towards me:

Dillon had outscouted, so took his turn first, with a very good run of cards getting the pike unit in front of my camp (the pike block top left in the picture, above) into contact immediately.

No matter, I had troops either side who could advance forward and swing into his flank. Then I pulled my first card of the game:

This was not good, to say the last, but no need to panic: the pike blocks on the other side of the field hadn’t got to me yet, so a decent run of cards there would help out:

Fortunately this was only a temporary set back, and my troops soon surrounded two of the Swiss pike blocks and began thumping at their flanks:

And meanwhile a unit of Knights had snuck through and taken half the Swiss camp:

This was all well and good, but the pike blocks in the centre were just refusing to die. Flank charge after flank charge, rear charge after rear charge, I just couldn’t get the four hits I needed to kill them, and the Swiss light infantry was doing a good job in distracting my men as well.

You can also see that the Swiss pike block facing my camp has chewed its way through one unit of Venetian Spearmen and is now right up against the camp itself: unfortunately defended only by some raw militia types.

This meant that both my camps soon fell, taking the last of my victory medals with them, for a 5-12 loss.

Not a very good start, but not a disaster, and three more games to go!

TFL Painting Challenge: First April Update

I can see that the recent Easter weekend had many of you painting hard, so it must be time for the first April update to this year’s 10th Anniversary TFL Painting Challenge.

First up this time round is Mr Helliwell, with another large submission of 28mm WOTR figures:

Matt Slade is still painting his Classical Indians: here’s a couple of generals on elephants and two shots of the rather lovely camp he’s done:

Next up, Carole continues her quest to work her way through vast amounts of Mantic 28mm sci-fi scenery. Eight pieces submitted this update, here are four of them (you can see the rest in her gallery, acceissible vis the NavBar, above):

And to finish here are entries from Sapper (WOTR is 28mm), Mervyn (ACW in 15mm), Mr Burt (Napoleonic Hussars in 28mm) and a welcome return from Mr Luther (6mm railroad elements):

Keep them coming!

IMPORTANT ANNOUNCEMENT

NEW EMAIL ADDRESS FOR SUBMISSIONS

Due to the fact that I have changed my domain hosting away from Yahoo to Squarespace, I have lost the admin@vislardica.com e-mail address. Silly me for not anticipating this and letting you all know! From now on, can we use vislardica@gmail.com please.

Painting Epic Scots

Friend John kindly gave me a couple of those Warlord Epic Scots Covenantor free sprues that came with Wargames Illustrated a few months ago, so it was time to get them painted and onto the table.

First up was a large unit of Commanded Shot. I decided to give them a natty pair of red trousers: not very dour but I fancied a change from Hodden Grey. The command figures came from Eureka: a bit taller than the Epic’s, but then you want some big men in charge!

As before, the epic slugs painted up very easily and were actually quite fun to do. In fact, it took me so little time to finish this lot that I went straight into painting a second batch, this time with more traditionally coloured trews!

The flags, by the way, come from Maverick Models. They are a simple Cross of St Andrew custom printed for me by Steve, the proprietor. The cloth effect makes them very simple to use (much easier than paper flags) and they end up looking very good indeed.

With two large units of Commanded Shot completed in record time, I could spare the effort to use some of the single figures on the sprues to produce three bases of Attached Shot: something to give my artillery a little better chance of survival on the battlefield.

These were obviously just like painting standard 15mm figures…they are nicely posed and I particularly like the chap priming his pan (front left on the right hand base).

Finally, although not Scots, or Epic 15mm scale, I also had a chance to paint up another Spear unit for my 28mm Venetians. These are Perry plastics and, as usual, a slight pain to build compensated for by the variety and realism of the poses that can be generated, and the ease with which they paint up.

TTS AAR: Venetians Abroad vs Timurid

A practice game for the forthcoming Medieval Mayhem competition at Roll Call saw my Venetians travelling Abroad to fight Peter’s Timurids. This was the first time I had used the Venetians using the Venice Abroad list rather than the Later Italian Condotteri list, so I was interested to see how they would do.

First up, the Venetians were outscouted (a distinct lack of canals on the Steppes!), with the result that the two battle lines ended up as below: both sides overlapping only in the middle of the field.

I suspected that Peter planned to lap around my left flank with his cavalry, so quickly moved my Knights across to face his horsemen. My infantry also began to move diagonally forward in order to get into th action as soon as possible.

I was aware that I ran the risk of “wasting” my troops in the centre of the field against scythed chariots and driven slaves - neither of which, if destroyed, would cost Peter any victory medals - but, as I said, this was a test game just to see what the army could do.

My plan, therefore, was to hold the left, or at least achieve like-for-like losses, whilst my centre chewed through the Timurid “disposables” and then pivot my line so we fought each other perpendicular to our start points.

As expected, Timurid light horse lapped around my left, but my Knights largely ignored their presence, getting stuck in to the enemy heavy cavalry as soon as they could.

All seemed to be going nicely to plan when fortune kicked me firmly in the fork!

If you look at the picture below, you will see three of my units of Knights in action. Two are engaged with the enemy heavies (one winning their encounter, the other even-stevens) whilst another (the one in the foreground) has got behind Timurid cataphracts and is presumably about to drive them from the field.

At this point, the unit of enemy light cavalry that you can see bottom right turned and attacked my Knights from the flank. No problem, I hear you cry, these are Knights, Later Knights at that, they laugh at the efforts of lights to inconvenience them.

Not so today. Two successful activations followed by a great (from the Timurid point of view) run of cards saw my Knights first disordered then sent fleeing from the field!

Leaving aside the activations, that’s two successful 30% chances to hit followed by two 40% chances of failing a save: or a 1.44% chance of the cards falling as they did.

The Timurids naturally took full advantage of the situation, and soon my Knights on the left were under attack from all sides.

Meanwhile, in the centre, my troops were having a hard time disposing of the Timurid ‘disposables’: they just wouldn’t die!

That changed very rapidly, however, when my veteran Later Knights, with General and Army Standard, intevened and, after a slight hiccup in round one of their attempt, swept both units of Driven Slaves from the field in two glorious charges. It was just a pity they weren’t worth any victory medals!

As one unit of my Knights on the left just refused to die, and I kept pushing the Timurid Light Cavalry off table, the overall situation was actually fairly even at this point: I held the right hand side of the field, Peter held the left and with only a slight advantage in terms of victory medals won.

Most of my troops were, however, now disordered, and before I could get my rallies in, the Timurid horse archers managed to do the damage they need to send one unit of my Spearmen from the table. That, combined with eventually losing the last unit of Knights on the left, was enough to lose me my final victory medal, so the game was Peter’s.


So a bit of a damp squib ending to what had been an absolutely cracking encounter. Some would say the battle was effectively over when I unexpectedly lost the Later Knights on the left, but the Venetians almost pulled it back despite that unlucky blow.

THis weekend, the Venetians continue their voyage Abroad with a trip to, of all places, Milton Keynes for Medieval Mayhem at Roll Call. There must be some canals there, surely!

Timurid Camps

The Ancients rules that I use, To The Strongest, require an army to have at least one camp of some sort: something that gives you extra victory medals, and gives your opponent somethingt o aim for.

Up until now, I’ve used generic trays with some kind of marker in them to indicate it’s a camp: a single hut or the like…but nothing very fancy.

Recently, however, I’ve been admiring the beautiful camps that people have been using in the TTS competitions I’ve been attending, so I thought it was perhaps time to up my game a bit.

Here, then, are the first of my specific (as opposed to generic) camps: three bases for my 15mm Timurid army.

The two yurts are from Baueda, with the pile of skulls in the middle something I bought from Etsy. They are each mounted on a 10cmx10cm base from Warbases.

I’m now going to buy a whole load more 10x10 bases from Warbases and repeat the process for some of my other Ancients armies.

Here’s the middle camp with a Timurid command figure.

FK&P AAR: Plumleigh Common

Those of you who have been following Rob and I’s play through of the Siege of Norchester campaign will know that so far my Parliamentarian have not been doing very well: I’m currently ten victory medals behind overall, so really needed a decent win at Plumleigh Common to put me back on track.

In this scenario, the Cavaliers are trying another assault on the Roundhead siege lines, but this time the Parliamentarians are ready for them, resulting in an all out battle.

The picture above shows the view from behind the Parliamentarian lines, with Norchester itself being top left. My plan was to advance my Borders Horse on the far right around the flank of the enclosed fields, block any advance of enemy infantry out of the enclosures, and strongly advance in the centre and win the battle there.

The Battle of the Enclosures

The first part of my plan was to drive the enemy horse back on the far right flank. Although our forces numbered the same, my troops were mounted on nags rather than the sleek chargers of the oppositiom, so I knew I needed to win quickly or have my cavalry blown for the rest of the game.

The Royalists helped my cause by attacking piecemeal, and soon I had the advantage:

Unfortunately that didn’t last, and the situation devolved into a back and forwards encounter that neither side seemed likely to win until Rob sent some infantry in to reinforce his cavalry.

This gave him a temporary advantage and, for the moment it looked as if that flank would be lost to me.

Back in the Centre

Meanwhile, back in the centre, I had advanced quickly forward. On the right side, I had no wish to advance against the Royalist infantry safe behind the hedges of the enclosure, so was happy just to block their exit. In the centre centre, I advanced forward quickly in order to gain the initiative. Both sides avoided moving troops into the ground between Norchester and my works: too swept by artillery to be safe!

Battle was soon joined, and a general melee broke out:

All was going well until a squadron of Royalist cavalry threatened the left flank of my line. Fortunately I had a unit of the Puritan Horse there against just such a move, so charged the enemy horse downhill, confident of victory.

Unbelievably, Rob’s cavalry made four saves against the attacks on them, meaning my men swept downhill and literally bounced off the enemy. To add insult to injury, the Royalist cavalry then counter-charged and sent my men fleeing from the field!

Luckily I had reinforcements I could move to protect the flank…well, to be honest, it was a battalia of infantry that had got stuck, unused, behind the main battleline, so it was good to actually have something useful for them to do!

The fighting in the centre was now intense, and I had already had to recyle one of my Scots Battalia: it was all going to be down to whose troops could last the longest.

My left flank was also looking problematic, and even moving some of the pioneers out of the siege works to help didn’t make a huge difference. In the scenario, pioneers are represented by Highlanders: very much a one-shot weapon and useless against the cavalry they were facing!

Endgame

The main line finally shattered in both directions at once: with one of my Puritan Horse units fleeing the field whilst another broke through. At the same time, the Pioneers distracted a squadron of enemy cavalry so much that they were pinned in place, unable to take advantage of their position.

It was still neck and neck but, suddenly, gloriously, my cavalry on the right wing, long forgotten about, decided to intervene and win the day.

Freed from the cavalry melee by the intervention of one of my Borders infantry battalia, who head soundly beaten the enemy infantry that had kept my horse pinned in place, the Scottish lancers crashed into the flank of an already disordered enemy infantry battlaia and smashed them from the field.

This, combined with all the losses taken by each side so far, and the fact that two of the Royalist cavalry squadrons left the field in pursuit, reduced Rob’s pile of victory medals to zero, giving me the victory.

It had been carnage on both sides: checking my pile of coins I saw that I had gained a four-medal victory, so combined we had lost 28 victory medals between us: the equivalent of around nine units or a third of the units depoloyed at the start of the game.

So, after five games, the Parliamentarians now trail by only six victory medals overall, and it’s on to Dick’s Tower for the next encounter!

TFL Painting Challenge: End of March Update

Morning all. Just about time to sneak in another update to the 2024 TFL Painting Challenge before the end of the month…and quite a bumper update it is too.

Starting us off today is the stakhanovite Mr Slade, who has sent in not only a legion (pun intended) of 28mm Romans but just about a whole 15mm Ancient Indian army as well:

Not far behind in terms of sheer volume is Stumpy, with a large amount of figures based up and ready for the table. Here we have 28mm Napoleonics and the start of a 28mm Dacian army:

Carole has also been busy: painting up a large amount of 28mm sci-fi scenery items from Mantic. Carole also sent in some giant spiders, but they are far too creepy to post!

The Wars of the Roses is always a popular period for wargamers, and Mr Helliwell has been amassing a collection and a half of suitable figures. Here’s his latest offering:

Sapper has been putting the finishing touches to his Viking and his Arab armies, all in 15mm:

And, finally, Mervyn sends in some 15mm American Civil War cavalrymen:

Don’t forget you can see more of everyone’s work in their individual galleries (accessesed via the NavBar, above) and, for those who want to see even more, there are the galleries from previous years’ entries available as well.

It’s the long weekend coming up tomorrow, so enjoy the four days off work and use them wisely i.e. paint more figures!

A bit of Miscellaneous Painting

Always good to add some character units to your rank and file, so when I saw that the 3D printed March to Hell range of Celts included war dogs and a handler, I knew I had to get one to act as one of the many "Heros” accompanying my Ancient Brits.

A nice little piece that paints up very easily indeed. The hounds were a single coat of Contrast Basilicum Grey over undercoat; the handler was painted as a normal Celt: dark blue tunic with light blue stripes.

Next are a couple of extras for my Venetians.

My Spearmen don’t seem to be achieving much, so here’s a unit of Alabadiers or Billmen who, hopefully, will fare a bit better.

The Alabardiers are made from the heads and bodies of spare normal infantry combined with the arms and weapons of spare knights, which is why they all look a bit top heavy!

It also got a bit crowded on the base…which is why, in the back rank, one of them is smashing the back end of his axe into the face of another! I should perhaps have dropped a figure from each line or at least spaced them out properly.

Finally, a unit of light crossbowmen and an infantryman carrying a flag that I can use either as an army standard or to mark where a dismounted general is or the like.

TTS World Champioships 2024: Game 4: Venetians vs Tang Chinese

My fourth and last game at World’s pitted my Venetians against another Tang Chinese army…and having lost rather badly against Peter’s Tang in Round 2, I was rather hoping to do a bit better against Roger’s Tang in Round 4!

As things hadn’t been going very well so far, I decided to throw caution to the wind and (a) field most of my Later Knights as dismounted and (b) just get stuck in as soon as possible. Tactics, schmactics and all that!

Accordingly, as soon as the whistle went, I sped forward: my foot Knights sprinting up the field towards the opposition:

The sharp-eyed amngst you will have noticed that Roger had sent some horsemen rushing forward towards my right flank, seeking to get behind my advancing Knights or to sack my camps.

Fortunately I had antipated such a move and left a small force to deal with these intruders and, with a little help from the cards, the two enemy horse units were soon destroyed and my flank secured.

Meanwhile, on the left, I had sent some Knights forward to see if they could work their way around Roger’s flank.

Unfortunately, although I did manage to kill a couple of enemy units, it took me some time to do so - winkling lights out of a wood proved more time-consuming than I had anticipated - and, at the end of the game, my troops here were only just starting to break through.

All of which meant that it was centre that would decide things.

My dismounted knights, spear and pike units stormed forward, intent on causing mayhem, but their earlier sprint up the field had obviously exhausted my knights who proved unable to break the enemy in front of them.

My pikemen, however, did much better: driving forward clearing all before them before turning in to threaten the enemy flank.

By this time, however, Time’s winged chariot had hurried near, and the clock had somewhat un-Marvellously run out, the last game of the day being a either a really long one with no time limit or, in this case, a somewhat truncated affair due to needing to end the day on time.

The result? A winning draw 7-3 for my Venetians: not the score I needed to resurrect my fortunes. This meant that, once the scores had been totted up, that I came 14th overall: very disappointing.

Still, it’s all about the playing, not the winning (he said through gritted teeth with his nose visibly lengthening as he did so) and they had been four great games against four worthy and sporting opponents. The day was also superbly organised, so thanks to all involved: Si, Mark, Bevan, Steve, John et al. I really would recommend this event to any TTS player.

Meanwhile, my troops slunk back to their canals for more training: duri ai banchi as we Venetians like to say!

TTS World Championships 2024: Game 3: Venetians vs Ancient British

The story so far: one big win, one big defeat…so it was all to play for in game three of the 2024 To The Strongest World Championships.

This time, my Ventians would face Matt’s Ancient British, and lot’s of them there were too!

The Ancient British outcouted, and before I knew it, I had shed loads of barbarians coming right at me: chariots and cavalry on the wings, infantry in the centre.

There was nothing for it but to get straight back at them and see what happened!

The two lines came together with a mighty crash…

…but honours were fairly even. The Brit infantry were in deep units, but my Knights had better saves, so things pretty much cancelled themselves out.

Cue a grinding melee that swung backwards and forwards between us: before too long, most of Matt’s units were on two disorders and most of mine were on one, but my pikemen and spearmen were having a good day and were pushing forwards towards the British camps: it was all going to be down to who gave way first.

Then disaster struck: one of Matt’s warbands broke through my line and charged towards my camp.

No matter, I thought, I have light infantry handgunners behind fortifications, and whenever I have tried taking a fortified camp packed full of light infantry, I have failed again and again and again.

Not today, however.

With barely a pause to draw breath, the British warband smashed straight through the fortifications into the camp, killing my lights as they did so. Four coins down!

Next thing, the game ended due to time considerations, with the Venetians recording a 4-9 losing draw: actually the first time I have not had a clear “win/lose” result in a competition game.

It had been a great encounter with a tough opponent. Had we continued, I think Matt would have quickly taken the rest of my camp and therefore the game but, on the other hand, there was also a fair possibility that I could have caused a general collapse in his line first, which could just about have given me the win…but I guess we will never know.

Must be an excuse for a return match some time in the future!

TFL Painting Challenge: Another Update

Apologies for the lack of posts this week: very busy at work…buit now that it’s the weekend, I have time to do a very necessary update to this year’s TFL Painting Challenge.

A good week this week, including the return of Mr Davenport after a four-year absence. He has sent in some very nice 28mm American War of Independence figures, all Perry 28mm with GMB standards:

Next up is Sapper, who has let the painting pile up and submits a vast cornucopia of 15mm figures: Polish Winged Hussars, Arabs and a few Vikings thrown in:

Another large entrant this week (in terms of number of figures not necessarily girth!) is Mr Helliwell, with another Wars of the Roses, late Medieval collection.

This is only a part of what Andrew has submitted, so do visit his gallery for more. I’ve also included one of his self-made ponds/march terrain pieces as well:

I love Mr Emmett’s work as well. Here he sends in some WW2 Poles and, featured below, a lighthouse, shed and dock:

Finally for this update, we have some Egyptian columns from Carole, some Dwarf command stands from Ralph, and some bases for Strength & Honour from Mervyn:

So a very good haul indeed this update, including Andrew Helliwelll being the first person to break the 1,000 point marker this year…but I’m sure there will be many more following hereafter!

TTS World Championships 2024: Game 2: Venetians vs Tang Chinese

The consequence, or course, of having had such a good first game meant that in round two I was once again up against Peter - winner of many, many tournaments and a regular opponent - and his Tang Chinese.

To my shame, I must admit that I did have a minor temper tantrum at the news: but, in my defence, I was very tired after a very long week’s work, and who would want to face Peter in a tournament…charming chap that he is, he does have a tendancy to win!

Anyhoo, tantrum over, it was time to settle down to the game:

As you can see from the picture, above, things did not start off very well for me!

Peter’s Tang outscouted my Venetians, and a superb deployment on his part and some good cards to begin saw his light cavalry, soon to be followed by heavier cavalry, all over my right flank.

This move to the (his) left, also meant that a third of my army was effectively facing thin air: not a good situation.

Some good manouevring on my part, however, brought the left hand contingent of my heavy knights back into the action and, in fact, got them into a great position to flank charge some of his central units.

Unfortunately, my new specially-bought,Venice-backed playing cards chose that moment to wobble, and my flank charges and moves across the field failed to happen as I had planned: disaster!

This meant that rather than putting the battle on a more even footing with some locally good superior numbers and flank attack possibilities, Peter had the time to turn to face my troops coming at him from his right flank to block my advance there. He was effectively where I had been at the start of the battle on my right, but also in an echelon formation that further prevented me using my superior numbers to advantage.

Meanwhile, of course, he had already achieved superiority of numbers on my right flank, and was able to use them to bash me up there before I had the chance to do the same to him on his right. He was (as ever, some would say) one step ahead of me.

Now it was just a matter of time, and Peter was soon able to start to sending my troops fleeing from the field, meaning that I suffered a very bad 2-12 loss!

A superb example of how to wrong-foot your opponent from deployment, and although I was a trifle unlucky not to be able to at least partly rescue the situation in the middle part of the game, as we all know, a plan that depends on luck is not a plan at all!